TL;DR:
- Proper tent setup involves choosing a flat, well-drained site and assembling components in a fixed sequence. Practicing at home and following precise steps ensure faster, more reliable pitching in the field. Using appropriate gear like stakes, footprints, and tensioned rainflies helps maintain a dry and stable shelter overnight.
Tent setup step by step is the process of choosing a flat site, laying a footprint, assembling poles, staking corners, and attaching the rainfly to create a dry, stable shelter. Most beginners complete a standard dome tent in 15–30 minutes. That time drops by more than half after one practice run at home. Brands like Coleman and REI design their tents for fast assembly, but the sequence you follow matters more than the gear you buy. Get the order right, and your camp is comfortable before dark.
How to select the perfect campsite before tent setup
Site selection is the single step that determines whether you sleep dry or wake up in a puddle. No amount of quality gear fixes a bad location.
What to look for on the ground:
- Flat surface with no visible roots, rocks, or sharp debris
- Ground that sits slightly higher than the surrounding area to shed water naturally
- Natural windbreaks like tree lines or boulders on the windward side
- No drainage channels, dry creek beds, or low depressions nearby
- Enough clearance overhead to stake guylines without hitting branches
Flat ground away from drainage is the most critical factor. When rain hits, water follows the path of least resistance. A site that looks fine in dry conditions can pool two inches of water under your floor by morning.
Orient your tent door away from the prevailing wind. This keeps wind from forcing cold air directly into the tent when you enter or exit. A door facing east also catches morning sun, which helps dry condensation off the rainfly faster.
Clear the site completely before laying anything down. Kick away pinecones, pull out small rocks, and snap off any protruding sticks. A pebble the size of a quarter will feel like a fist under your sleeping pad after six hours.
Pro Tip: Walk the site in a slow circle before committing. Look for ant hills, wasp nests, and animal tracks. Five minutes of scouting prevents hours of regret.
What gear do you need before pitching your tent?
Every component of your tent assembly guide has a job. Missing one piece forces improvisation, and improvisation slows you down.
Standard tent components:
- Tent body (the main fabric structure with mesh panels)
- Shock-corded poles (sections connected by internal elastic cord)
- Tent stakes (typically 6–12 aluminum or steel pins)
- Rainfly (the waterproof outer shell)
- Footprint or groundsheet (a cut-to-size tarp that protects the tent floor)
| Component | Purpose | Common mistake |
|---|---|---|
| Footprint | Protects floor from abrasion and moisture | Sizing it larger than the tent floor |
| Shock-corded poles | Provide structure and shape | Pulling sections apart instead of pushing together |
| Stakes | Anchor tent against wind and movement | Driving straight down instead of at an angle |
| Rainfly | Blocks rain and reduces condensation | Skipping it on clear nights |
Lay every component out before you start. Color-coded poles and systematic gear layout prevent assembly errors, especially in low light. If your tent uses two pole colors, separate them before you begin.
The footprint goes coated side down, shiny side up. This matters because the coated surface repels ground moisture. A footprint larger than the tent floor acts as a rain funnel, channeling water directly under your sleeping area. Trim or fold the edges inward if your groundsheet is oversized.
Pro Tip: After your first home setup, write "FRONT" on the inside of the rainfly with a permanent marker. Marking rainfly orientation saves real time when you arrive at camp after dark.
What are the step-by-step tent pitching steps?
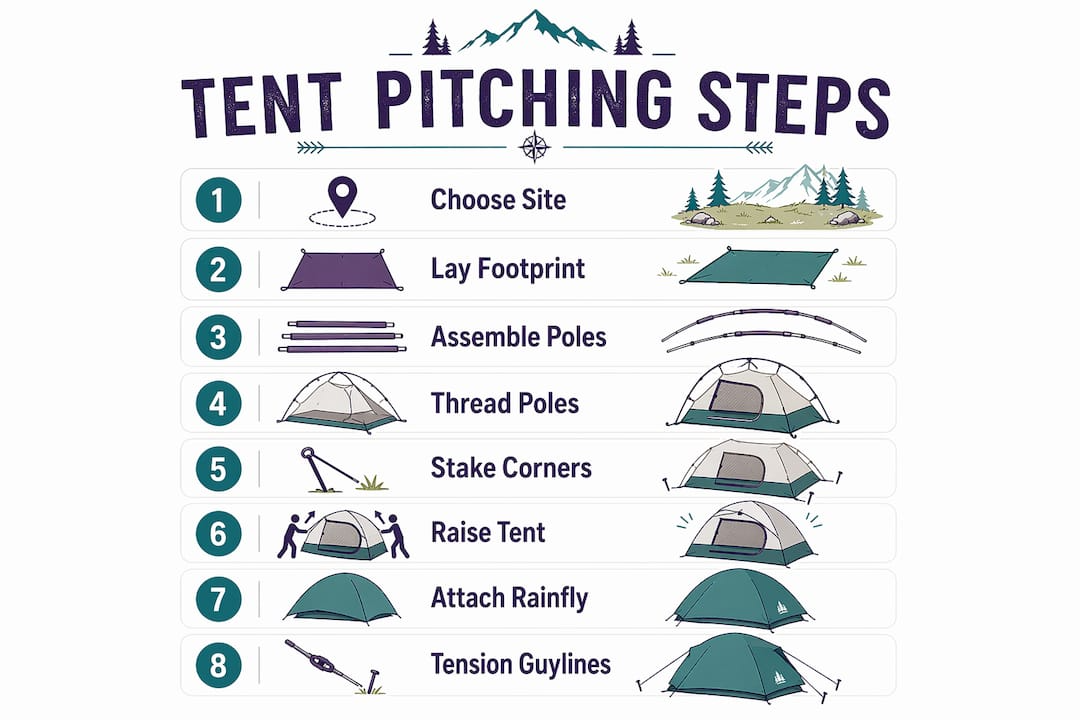
Tent pitching follows a fixed sequence. Skipping steps or reordering them creates problems that are harder to fix once the tent is standing.
Step 1: Lay the footprint and tent body
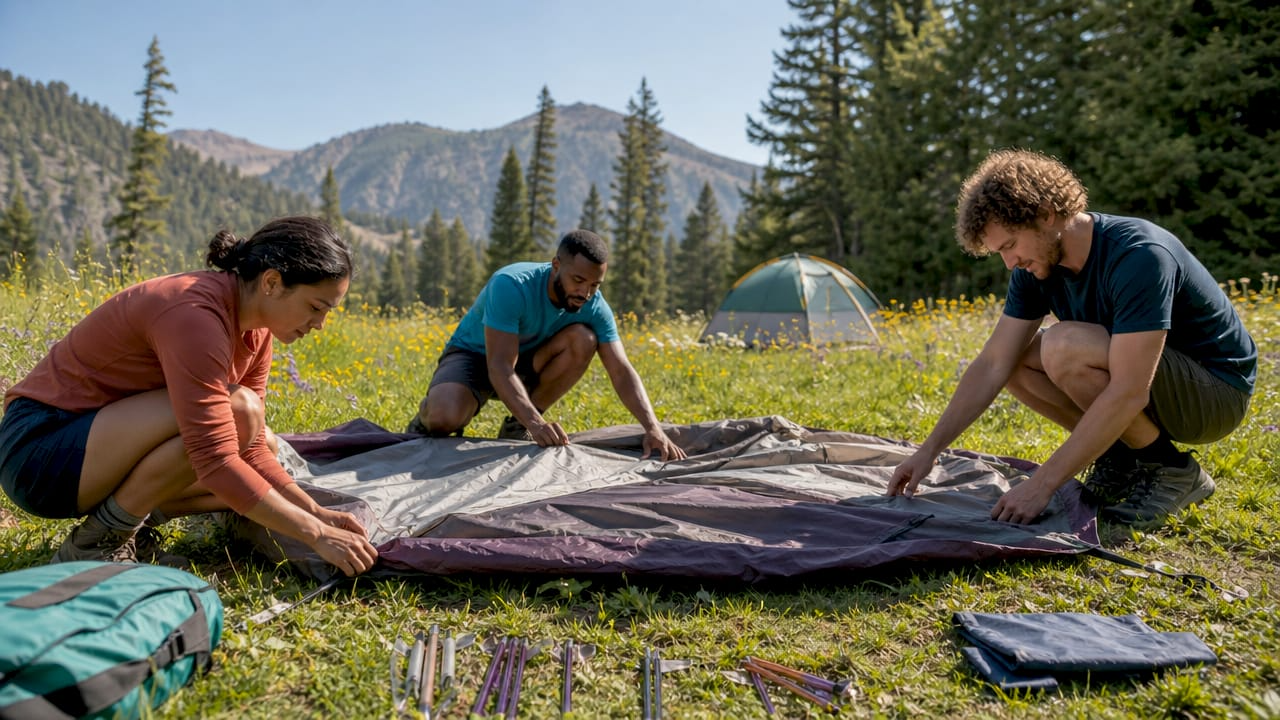
Place the footprint flat on your cleared site. Lay the tent body on top with the door facing away from the wind. Align the tent corners with the footprint corners so no groundsheet edge sticks out.
Step 2: Assemble the poles
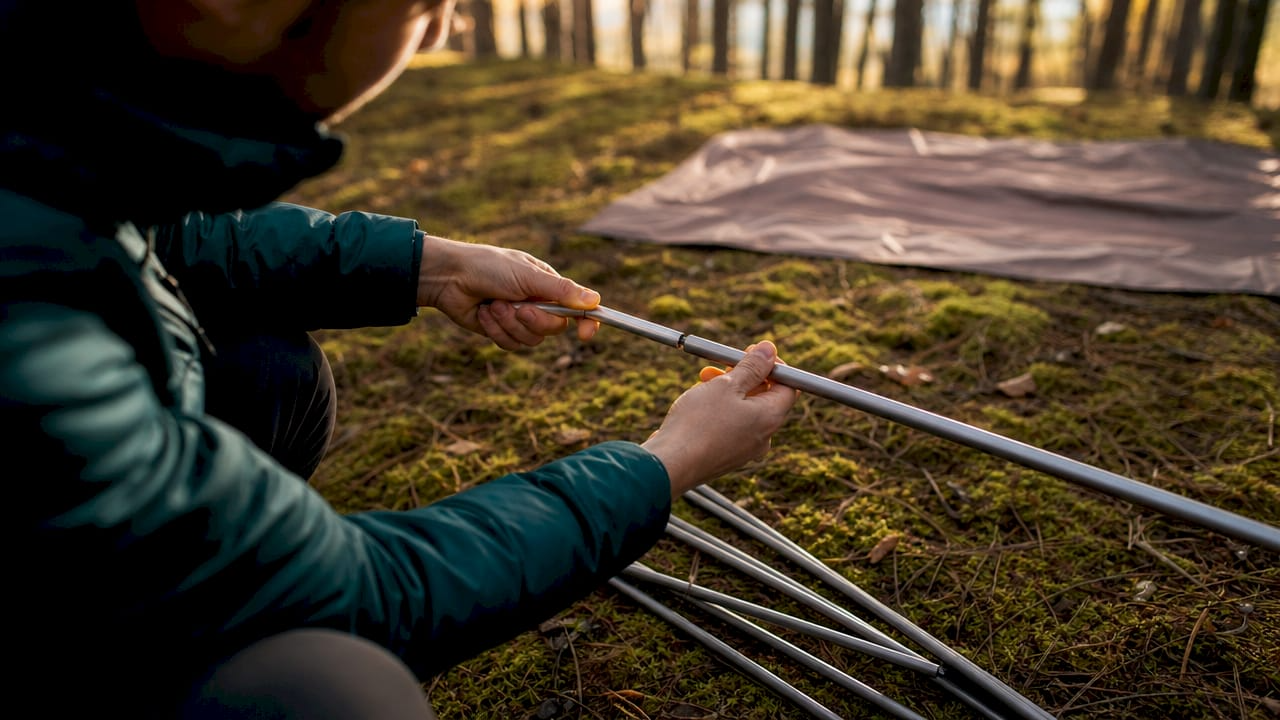
Connect each pole section by pushing sections together, not pulling them apart. Pulling stresses the shock cord and causes premature breakage. Lay assembled poles flat beside the tent before threading them through sleeves or attaching clips.
Step 3: Thread poles and stake two corners
Thread or clip the poles according to your tent's design. Before raising the tent, stake two opposing corners loosely. This holds the tent body in place while you work and prevents the structure from shifting as you apply pressure.
Step 4: Raise the tent and stake remaining corners
Bow the poles into their grommets to raise the tent. Stake the remaining corners, pulling the fabric taut as you go. Drive stakes at a 45-degree angle leaning away from the tent. This angle maximizes holding strength and prevents the stake from pulling out under load.
Step 5: Attach the rainfly and tension guylines
Drape the rainfly over the tent body and clip or velcro it to the pole structure. Pull the guylines out from the tent at an angle and stake them into the ground. The goal is an air gap between the rainfly and the inner tent walls.
Why the air gap matters: Experts recommend using the rainfly every night because dew accumulation can be as moisture-intensive as light rain. Without an air gap, the rainfly touches the inner wall and transfers that moisture directly to your sleeping area.
Common mistakes to avoid:
| Mistake | Consequence | Fix |
|---|---|---|
| Skipping the rainfly on clear nights | Dew soaks inner tent walls by morning | Always attach the rainfly |
| Over-tightening stakes | Tears stake loops and warps pole grommets | Taut, not stretched |
| Incorrect stake angle (straight down) | Stakes pull out under wind load | Drive at 45 degrees, angled away |
| Footprint larger than tent floor | Channels rain under the floor | Fold edges under or trim |
Pro Tip: Pitch your tent before sundown. A 4-person dome tent takes two people about 15–20 minutes in good light. The same job in the dark takes twice as long and produces twice as many errors.
How do you fix common tent setup problems in the field?
Even a well-practiced camper hits problems. Hard ground, soft soil, and a sagging rainfly are the three most common issues beginners face.
Hard ground: A rubber mallet works best, but a boot heel drives most aluminum stakes into firm soil without bending them. Using a rock or boot heel to drive stakes avoids damage and increases holding power. Never use a sharp rock directly on the stake head.
Soft or sandy ground: Standard stakes pull out easily in soft soil. Bury a stake horizontally at a depth of six inches with the guyline tied to its center. This "deadman" anchor holds far better than a vertical stake in loose ground.
Rainfly sag and condensation: A sagging rainfly touches the inner tent wall and transfers moisture. The "Dry Interior Rule" from outdoorithm.com frames every setup decision around one question: does this keep the inside dry? If the rainfly sags, re-tension the guylines until the fabric is drum-tight and no longer contacts the inner wall.
"A properly tensioned rainfly that does not contact inner tent walls is critical for a dry interior." — How to Set Up a Tent (So It Survives the Night)
Final stability check: Walk around the tent and press lightly on each pole junction. Poles should feel locked and even. Tug each stake to confirm it holds. Check that the rainfly tension is balanced on all sides. An uneven rainfly creates wind drag that can collapse a tent in a strong gust.
Pro Tip: Pack a small headlamp in your tent bag, not your main pack. When you need it for a nighttime setup, it will be exactly where the tent is.
Key takeaways
Correct tent setup follows a fixed sequence: site selection, footprint placement, pole assembly, staking at 45 degrees, and rainfly tensioning to maintain a dry interior.
| Point | Details |
|---|---|
| Site selection first | Choose flat ground away from drainage channels before unpacking any gear. |
| Footprint sizing matters | Keep the footprint smaller than the tent floor to prevent rain from funneling underneath. |
| Push poles, never pull | Pushing shock-corded sections together protects the elastic cord and prevents breakage. |
| Stake at 45 degrees | Angling stakes away from the tent maximizes holding strength against wind. |
| Always use the rainfly | Dew accumulates every night and soaks inner walls without a properly tensioned rainfly. |
What I've learned from setting up tents the wrong way
The most common mistake I see is speed. Campers rush the setup because they want to get to the fire, the food, or the view. That haste produces a tent that leans, leaks, or collapses at 2 a.m.
The single habit that changed my setup quality was practicing at home. I set up my Coleman Sundome in the backyard twice before my first trip. By the second run, I had the sequence memorized and the time cut nearly in half. That practice also showed me that my footprint was two inches too wide on one side, a detail I would have missed in the field.
The rainfly is where I see the most beginner errors. Clear skies feel like permission to skip it. They are not. Skipping the rainfly leads to damp gear by morning, even on nights with no rain at all. I now attach the rainfly as a reflex, regardless of the forecast.
Tension balance is the last thing most guides mention and the first thing I check. A tent that looks fine can have one side of the rainfly touching the inner wall. That contact point becomes a drip point by 4 a.m. Two minutes of adjustment before bed prevents a wet sleeping bag.
My advice for any first-time camper: follow the easy tent setup instructions in sequence, resist the urge to skip steps, and treat the rainfly as non-negotiable.
— Billy
Gear that makes your next camp setup easier
Setting up a tent correctly starts with having the right equipment for the job.

Lifecampadventure carries a curated selection of camping tents, footprints, stakes, and rainfly accessories chosen for durability and ease of use. Whether you are buying your first dome tent or replacing worn stakes, the tent comparison guide at Lifecampadventure breaks down top models side by side so you can match the right tent to your trip. For a broader look at what to pack before you leave, the best camping gear roundup covers tents, stakes, and accessories that hold up in real conditions. Good gear does not replace good technique, but it makes every step faster and more reliable.
FAQ
How long does tent setup take for a beginner?
First-time tent setup takes 15–30 minutes for a standard dome tent. One practice run at home cuts that time by more than half.
Do I need a footprint under my tent?
A footprint protects the tent floor from abrasion and ground moisture. Size it smaller than the tent floor so it does not channel rainwater underneath your sleeping area.
Should I use the rainfly if no rain is forecast?
Yes. Dew accumulates every night and can be as moisture-intensive as light rain. Using the rainfly every night prevents condensation from soaking the inner tent walls.
What angle should tent stakes be driven at?
Drive stakes at a 45-degree angle leaning away from the tent. This angle provides the best holding strength and prevents the stake from pulling out under wind load.
How do I anchor a tent in soft or sandy ground?
Bury a stake horizontally at about six inches deep with the guyline tied to its center. This deadman anchor holds far better than a vertical stake in loose or sandy soil.
