TL;DR:
- A survival kit checklist ensures safety by covering essential categories like water, food, and first aid, which must be maintained regularly for reliability. Customizing kits to individual needs and practicing with them twice a year prevents expiration issues, over-packing, and unpreparedness during emergencies. Different kit types suit specific scenarios, and incremental building on a budget makes preparedness achievable without unnecessary weight or cost.
A survival kit checklist is the organized list of supplies that keeps you safe, fed, and connected during emergencies or outdoor adventures. The difference between a kit that works and one that fails comes down to three things: what you pack, how you organize it, and whether you maintain it. Most people assemble a bag once and forget it. That's the mistake that turns a manageable situation into a dangerous one. This guide gives you the exact categories, items, and maintenance habits you need to build a kit that actually performs when it counts.
1. Your survival kit checklist: the core categories
A well-built emergency preparedness list covers eight categories. Skip one and you create a gap that can compromise everything else.
Water and hydration is the non-negotiable starting point. The City of Calgary recommends 4 liters of water per person per day as the baseline for a 72-hour kit. That means a family of four needs 48 liters minimum for three days. Beyond stored water, include a filtration device like a LifeStraw or Sawyer Squeeze, plus purification tablets as a backup. Water filtration devices extend your survival window significantly by making natural sources safe to drink.
Food and nutrition should focus on calories and shelf life, not variety. Pack non-perishable, minimal-prep items: energy bars, freeze-dried meals, jerky, peanut butter, and crackers. Aim for at least 1,200 to 2,000 calories per person per day. A manual can opener is mandatory if any of your food comes in cans.
First aid and medical supplies form the safety backbone of any kit. Your kit should include bandages, gauze, antiseptic wipes, medical tape, pain relievers, and antihistamines. Calgary also recommends prescription medications be included for anyone who takes them regularly. A printed list of dosages and medical conditions belongs in this section too.
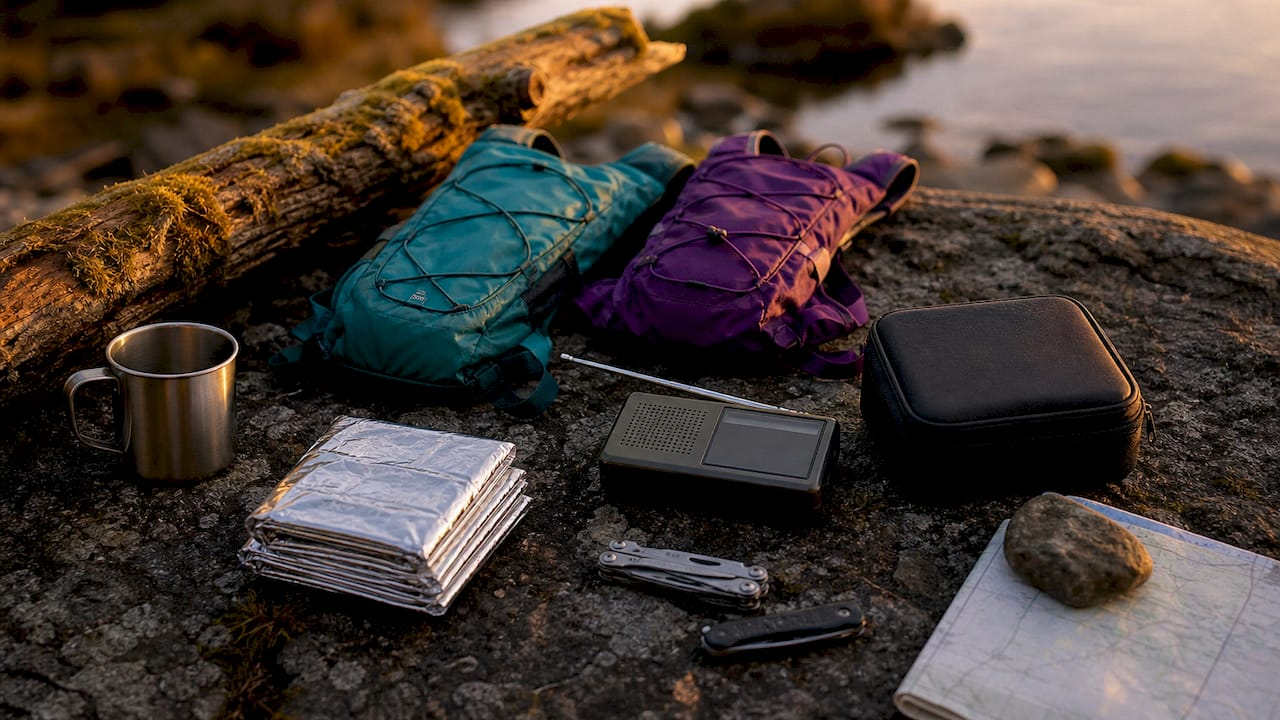
Shelter and warmth covers emergency Mylar blankets, a lightweight tarp or emergency bivy, and at minimum one change of weather-appropriate clothing per person. Body heat loss is the fastest path to hypothermia in wet or cold conditions.
Communication and navigation tools include a battery-powered or hand-crank NOAA weather radio, a whistle, a waterproof flashlight or headlamp with extra batteries, and a physical map of your area. Cell towers fail in major disasters. Analog backups are not optional.
Tools and gear should be compact and multipurpose. A quality multi-tool like a Leatherman Wave covers cutting, screwing, and gripping in one unit. Add duct tape, paracord, waterproof matches, a lighter, and a manual can opener.
Documents and cash are the most overlooked category. Store copies of your ID, insurance cards, passports, and emergency contacts in a waterproof pouch. Include small bills and coins. ATMs go offline during power outages.
Personal hygiene and sanitation supplies include hand sanitizer, N95 masks, moist towelettes, toilet paper, and a small supply of feminine hygiene or infant care products if relevant to your household.
Pro Tip: Place water, first aid supplies, and documents in external pouches or the top compartment of your bag. Organizing for quick access means you can grab what you need in under 30 seconds without unpacking everything.
2. How to customize and maintain your kit for reliability
A generic kit is a starting point, not a finish line. The CDC recommends tailoring kits to individual needs and performing updates every six months. That twice-yearly check is what separates a functional kit from a bag of expired supplies and dead batteries.
Here's a practical maintenance routine to follow:
- Check expiration dates on all food, medications, and water purification tablets every six months. Mark the check date on a piece of tape inside the bag.
- Test all electronics including flashlights, radios, and battery banks. Replace batteries proactively rather than waiting for failure.
- Update documents if any IDs, insurance cards, or emergency contacts have changed since your last review.
- Reassess for life changes such as a new baby, a pet, a new prescription, or a change in household size. Your kit from three years ago may not reflect your current situation.
- Rotate food supplies by consuming items nearing expiration and replacing them with fresh stock. This keeps costs down and quality up.
- Practice using your kit. Pull it out and locate each item by category. Time yourself. Familiarity under stress is a skill you build before you need it.
For family kits, build two layers of preparedness. Keep a portable grab-and-go bag ready for immediate evacuation and a larger home supply covering three to ten days for sheltering in place. The grab-and-go bag should weigh no more than 25 to 30 percent of the carrier's body weight.
Pro Tip: Set a calendar reminder for every April and October to run your kit check. Tying it to a seasonal change makes it a habit rather than a task you remember only after an emergency.
3. How different survival kit types compare
Not every situation calls for the same kit. Matching your outdoor survival checklist to the specific scenario is what makes preparation practical rather than theoretical.
| Kit Type | Best For | Duration | Portability | Key Contents |
|---|---|---|---|---|
| 72-hour kit | Evacuation, short-term disaster | 3 days | High | Water, food, first aid, documents, radio |
| Bug-out bag | Extended wilderness or urban emergency | 3 to 7 days | Medium | All 72-hour items plus shelter, fire-starting, filtration |
| Home emergency kit | Sheltering in place | 7 to 10 days | Low | Bulk water, food stores, generator supplies, medications |
| Vehicle kit | Roadside emergencies, commuting | 24 to 48 hours | High | Jumper cables, blanket, water, first aid, flares |
The Nevada Office of Emergency Management recommends kits covering 7 to 10 days with rotating supplies, particularly for households in regions prone to prolonged infrastructure failures like earthquakes or severe winter storms. That standard is higher than the common 72-hour benchmark and reflects the reality that emergency response is often slower than expected.
A bug-out bag checklist goes beyond the basics. It adds items like a water filter, fire-starting tools, a fixed-blade knife, a compact tent or bivy, a solar charger, and enough food for five to seven days. This kit is designed for scenarios where you leave home and may not return quickly.
A vehicle emergency kit is the most underbuilt category. Most drivers carry nothing. A functional vehicle kit includes a wool blanket, a liter of water, a basic first aid kit, road flares or LED triangles, a multi-tool, and a phone charger that works off the car's battery.
4. Practical tips for building your kit on a budget
Building a solid disaster supply list does not require a single large purchase. Incremental kit building reduces cost and complexity while still getting you to full preparedness over a few weeks or months.
- Start with water. A case of bottled water and a LifeStraw filter costs under $30 and covers the most critical need immediately.
- Buy multipurpose items first. A Leatherman multi-tool, duct tape, and paracord handle dozens of tasks. Specialized single-use gear can come later.
- Use store brands for consumables. Generic bandages, antiseptic wipes, and pain relievers perform identically to name brands at half the price.
- Buy in bulk for food. Warehouse stores like Costco sell bulk rice, oats, and canned goods at significant discounts. Divide and store in airtight containers.
- Repurpose what you own. A sturdy backpack you already have beats a purpose-built bag you haven't bought yet. A headlamp you use for camping works just as well in an emergency kit.
- Add comfort items last. A deck of cards, a small book, or a familiar snack costs almost nothing and matters more than people expect during extended stress.
Pro Tip: The single most overlooked item in budget kits is a physical, printed copy of emergency contacts and local shelter locations. Your phone battery dies. Paper doesn't.
Key takeaways
A survival kit checklist works only when it is built by category, customized to your household, and maintained every six months without exception.
| Point | Details |
|---|---|
| Water is the first priority | Store 4 liters per person per day and include a filtration device as backup. |
| Organize for speed | Keep water, first aid, and documents in external pouches for immediate access. |
| Maintain twice yearly | Check expiration dates, test batteries, and update documents every six months. |
| Match kit type to scenario | Use a 72-hour bag for evacuation, a home kit for sheltering, and a bug-out bag for extended emergencies. |
| Build incrementally | Start with water and multipurpose tools, then add categories over time to manage cost. |
What most survival kit guides get wrong
I've seen a lot of kits. The ones that fail share one trait: they were assembled once and never touched again. People spend real money on gear, feel prepared, and then open the bag two years later to find expired medications, dead flashlights, and food that's been eaten by moisture. Maintenance is the actual survival skill here, not the initial purchase.
The second mistake I see constantly is over-packing. Someone reads a bug-out bag checklist and builds a 60-pound bag they couldn't carry for more than a mile. A kit you can't move is a kit that doesn't work. Weight discipline matters as much as content discipline. Every item you add should justify its weight with clear utility.
The third thing people miss is practicing with their kit. Emergency preparedness is easier when you treat it as a skill, not a shopping list. The 5 P's framework, Plan, Participate, Protect, Prepare, and Practice, frames readiness as action rather than possession. Knowing where your tourniquet is and how to apply it is worth more than owning three of them. Pull your kit out twice a year, locate every item, and run through a scenario. That practice is what makes the kit real.
Flexibility matters too. A kit built for a single adult in a city apartment looks nothing like a kit for a family of five in a rural area with a dog and a diabetic family member. The essential survival steps are universal. The specific contents are personal. Build yours for your actual life, not a generic template.
— Billy
Gear up with Lifecampadventure
Lifecampadventure builds gear for people who take preparedness seriously. Whether you're assembling your first kit or upgrading an existing one, the right equipment makes the difference between a kit that works and one that lets you down. Browse the survival kit essentials guide for detailed breakdowns of what to carry and why. For a full overview of outdoor-ready gear across every category, the outdoor gear guide covers everything from shelter to navigation tools. Every product Lifecampadventure carries is selected for durability, weight efficiency, and real-world use.
FAQ
What should a basic survival kit checklist include?
A basic survival kit checklist covers water (4 liters per person per day), non-perishable food, a first aid kit, a flashlight, a battery-powered radio, a multi-tool, copies of important documents, and prescription medications. These seven categories address the most common failure points in any emergency.
How long should a survival kit last?
A standard 72-hour kit covers three days, which is the minimum recommended by emergency management agencies like the City of Calgary. The Nevada Office of Emergency Management recommends extending supplies to 7 to 10 days for households in disaster-prone regions.
How often should you update your survival kit?
The CDC recommends checking your kit every six months to replace expired items, test batteries, and update documents. Many kits fail during actual emergencies because of overlooked expiration dates and non-functional gear.
What is a bug-out bag and how does it differ from a 72-hour kit?
A bug-out bag is a more complete wilderness survival gear pack designed for extended emergencies lasting three to seven days away from home. It includes everything in a 72-hour kit plus water filtration, fire-starting tools, a compact shelter, and additional food. A 72-hour kit prioritizes portability and speed over extended self-sufficiency.
Can you build a survival kit on a tight budget?
Yes. Start with water storage and a filtration device, then add multipurpose tools like a Leatherman and duct tape. Building your kit incrementally over several weeks keeps costs manageable while still reaching full preparedness.
