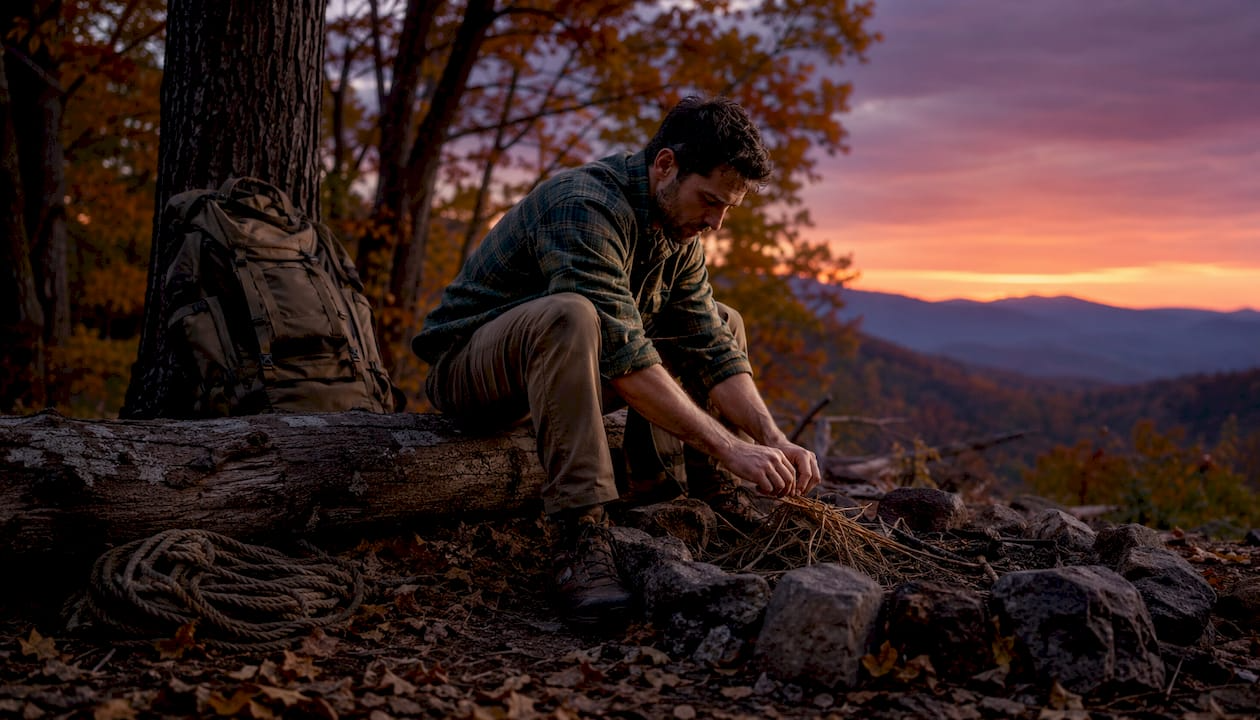
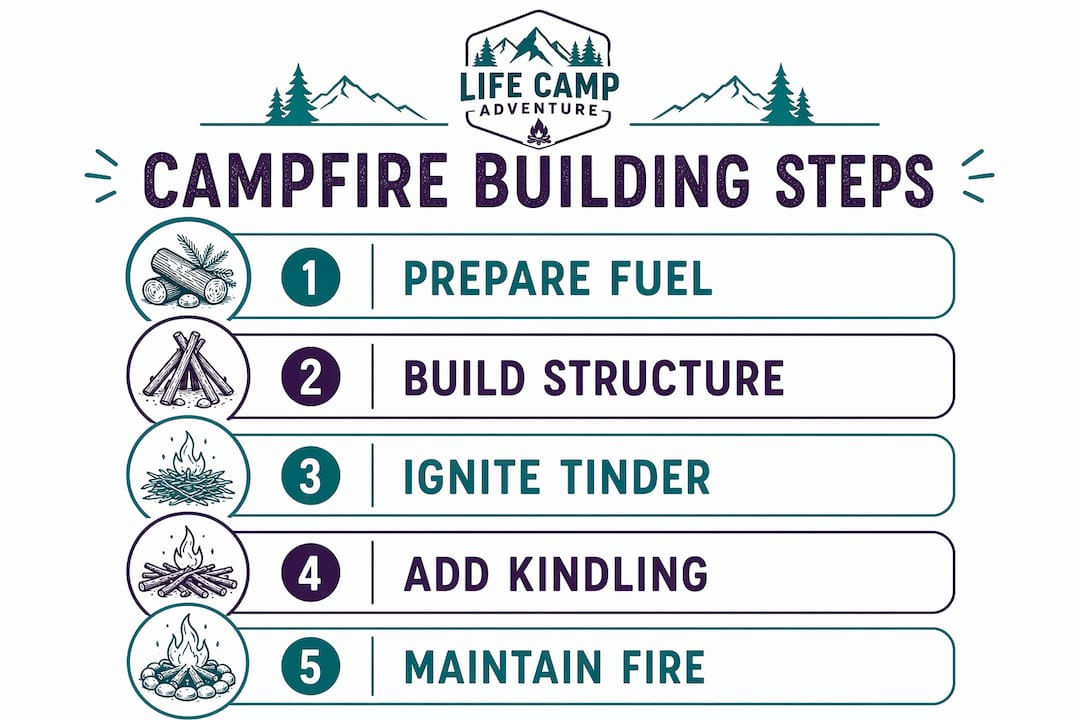
A reliable lighting a fire workflow follows one sequence every time: prepare your site, stage all three fuel tiers, build a structure that breathes, ignite from the upwind side, and feed the flame gradually. Get that order right and you will have a fire. Skip a step and you will be striking matches in the dark wondering what went wrong.
Here is the core workflow at a glance:
- Clear a fire site with at least a 10-foot radius free of dry leaves, pine needles, and grass
- Gather and sort all three fuel tiers before touching an ignition source: tinder, kindling, and then firewood
- Build your fire structure (tipi, log cabin, or platform) around the tinder bundle before you light it
- Ignite the tinder through the upwind gap, shielding the flame from wind
- Blow gently at the base once the tinder catches, then feed thin kindling gradually as the flame grows
- Add larger firewood only after you have a steady, hand-sized flame
- Keep water, sand, or mineral soil within reach before the first spark ever lands
Every step above matters. Pre-staging all fuel tiers before ignition removes the time pressure that causes most beginners to rush and fail.
What materials do you actually need before you light?
Getting the right materials together is half the job. Arriving at your fire site with a lighter and a vague plan to "find some sticks" is the fastest path to frustration.
The three fuel tiers:
- Tinder: Fine, dry, and loose. Dry grass, birch bark shavings, cattail fluff, dryer lint, or cotton balls coated in petroleum jelly all work well. The center of your tinder bundle should be finer than your hair.
- Kindling: Small sticks ranging from matchstick-thin up to pencil-thick. Collect at least two large handfuls, sorted by size, so you can feed the flame in stages.
- Firewood: Wrist-thick to forearm-thick dry logs. Start with the smaller end and work up. Standing dead wood is almost always drier than wood lying on the ground.
Ignition tools worth carrying:
- Long-reach lighters or butane lighters for direct, wind-resistant flame
- Stormproof matches as a reliable backup
- A ferrocerium rod (ferro rod) with a striker for a tool that never runs out of fuel in wet or cold conditions
One rule that changes everything: sort and stage all your fuel before you strike. Beginners often gather firewood after ignition starts, and the first flame dies while they are still searching. Lay out your tinder bundle, your kindling sorted by size, and your first few logs before you reach for any ignition source. That single habit, more than any tool upgrade, is what separates a fire that catches from one that doesn't.
Pro Tip: In wet conditions, split your sticks open and use the dry inner wood. The outside of a damp stick is wet; the inside is almost always fine. Shave the dry core into fine curls and use those as your first kindling.
How do you build the right fire structure?
The fire lay is the structure that organizes your tinder, kindling, and first fuel. No single layout works for every condition, so knowing three or four gives you real flexibility in the field.
Tipi (teepee)
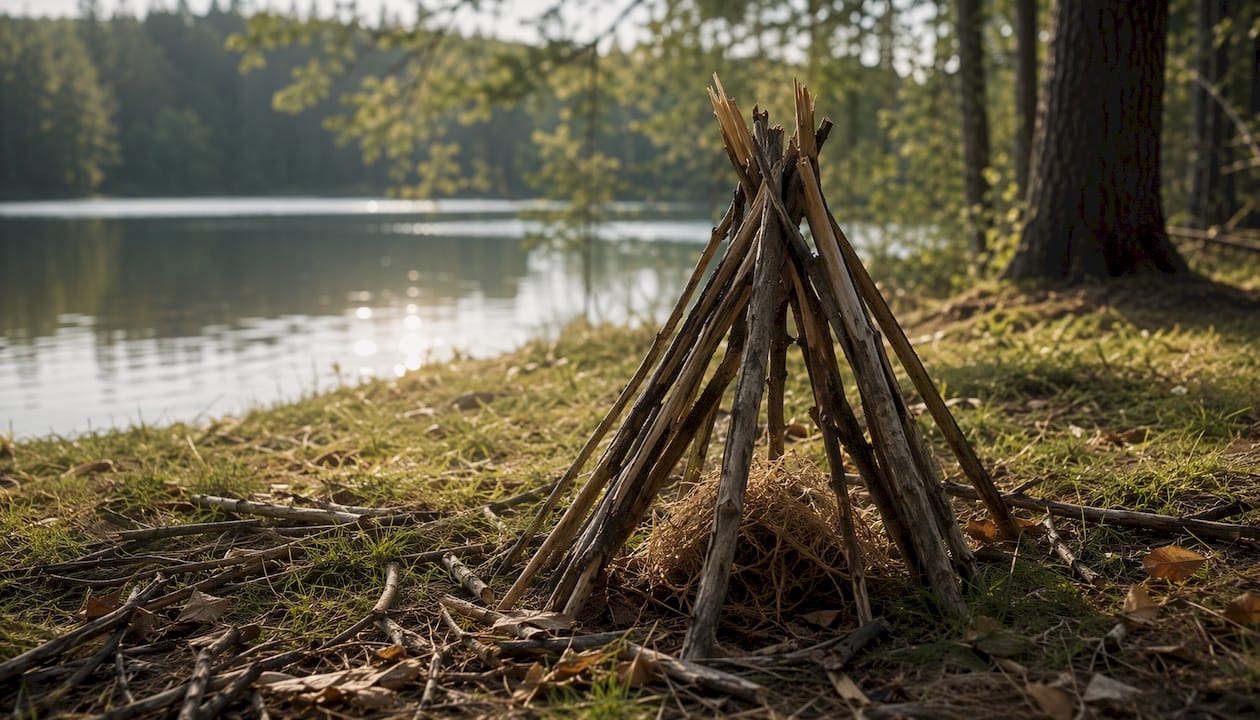
Lean kindling sticks inward over the tinder bundle so they meet at the top, forming a cone. Leave a gap on the upwind side for ignition access. As the outer sticks burn through, they fall inward onto the coals and feed themselves. This structure is best for quick, hot fires and exposed or windy conditions. It burns fast, so have extra kindling ready.
Log cabin
Build a square frame with two larger sticks parallel to each other, then two more on top at 90 degrees, crisscrossed like a log cabin wall. Place your tinder and thin kindling inside the frame. The log cabin burns more slowly and steadily than a tipi, making it a good choice when you want a sustained fire for cooking or warmth without constant tending.
Platform (upside-down fire)
Place your largest logs on the bottom, then layer progressively smaller wood on top, finishing with kindling and tinder at the very top. Lighting from the top down produces less smoke because the flames heat the wood below before igniting it, allowing moisture to evaporate first. This method works well in fire pits and is surprisingly forgiving for beginners.
Lean-to
Drive a stake into the ground at an angle, or use a log as a windbreak, and lean kindling against it facing the wind. The backer creates a sheltered zone where the flame can establish before catching the outer fuel. Use this when conditions are actively hostile, rain is falling, or wind is coming from one consistent direction.
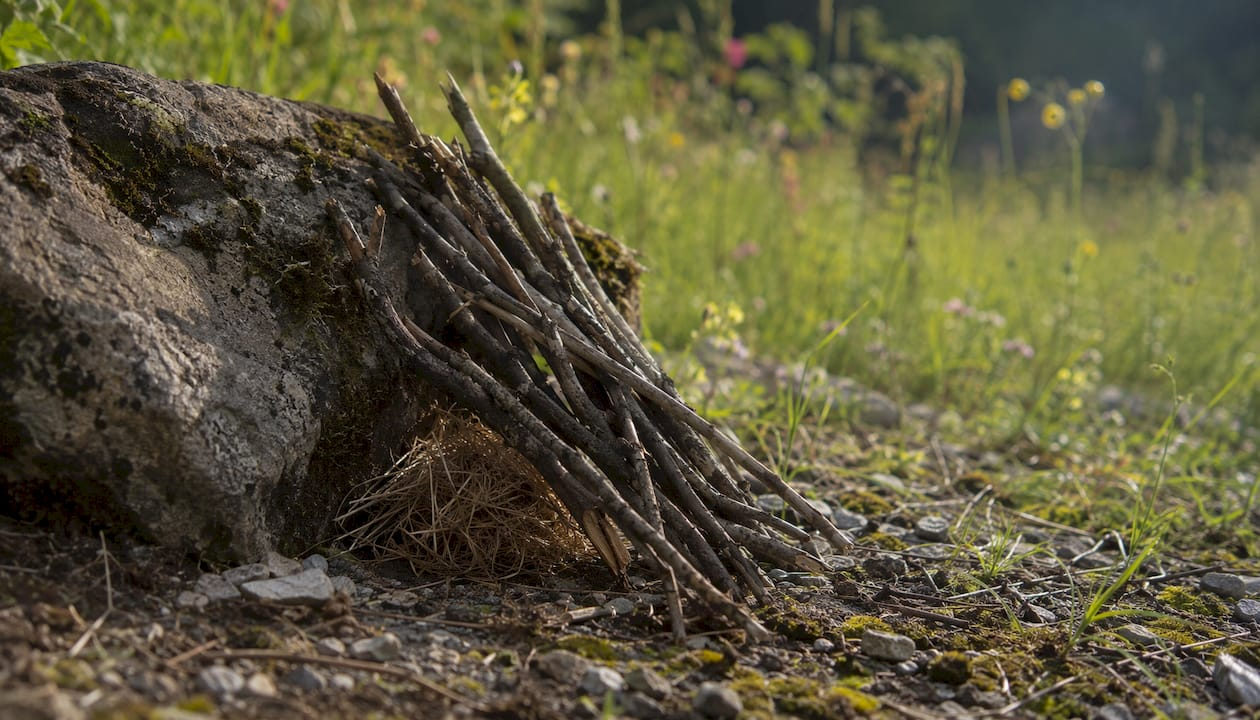
The mistake that kills most fire lays: packing tinder or kindling too tightly. A well-prepared tinder bundle is fluffed to hold air, not compressed. Fire needs oxygen at least as much as it needs fuel. If you can squeeze your tinder bundle into a tight ball, it needs to be fluffed out before you light it.
What do you do when you have no matches?
Matchless fire starting is a genuine skill, and it takes more preparation than most people expect. The ignition tool is rarely the problem. The tinder bundle almost always is.
Ferrocerium rod (ferro rod): A quality ferro rod produces sparks that reach approximately 5,500°F (3,000°C), which is far hotter than the autoignition temperature of dry plant tinder. Technique matters more than force. Hold the rod steady and draw the striker back toward you rather than pushing the rod toward the tinder, which scatters the bundle. A 3/8-inch diameter rod gives you a larger spark shower than a thin one.
Fire plough and hand drill: Both are friction-based methods that require dry, well-matched wood pairings. The hand drill is faster to set up but physically demanding. The fire plough involves carving a groove in a softwood board and pushing a hardwood stick back and forth until wood dust accumulates and ignites. Neither method is beginner-friendly without practice, but both are entirely free if you can identify the right wood.
Bow drill: The bow drill is the most reliable friction method for beginners because the bow multiplies your speed and reduces fatigue. It still fails most predictably at two points: an underprepared tinder bundle, and stopping too early at the 20–30 second mark when thin smoke appears. A real coal takes 30–60 seconds of continuous drilling and produces smoke that shifts from thin and light to thick and sustained. Stopping at the first wisp is the single most common bow drill mistake.
Commercial fire starters as backup: Petroleum jelly cotton balls burn for 3–5 minutes from a single spark, giving your kindling far more time to catch than a bare tinder bundle. Fire starter cubes from brands like Esbit or UCO serve the same purpose. Carrying a few of these does not replace skill, but it makes your system more resilient to wind, moisture, and cold hands. You can read more about fire starter options and how they fit into a real outdoor kit.
Pro Tip: Prepare your tinder bundle before you need it. Warm a slightly damp bundle inside your jacket for 10–15 minutes. Body heat alone can make the difference between a bundle that catches and one that doesn't.
Fire safety: what you must do before, during, and after
Safety is not a separate topic from fire lighting. It is woven into every step of the process, and having an extinguishing plan before ignition begins is non-optional.
Before you light:
- Check for active fire bans or restrictions in your area before gathering any materials
- Choose a site at least 15 feet from trees, bushes, and tents; use a designated fire ring when one is available
- Clear all flammable material (dry leaves, pine needles, grass) in a 10-foot radius around the fire site
- Place water, sand, or mineral soil within arm's reach before striking your first spark
- Build a windbreak if conditions are exposed to prevent sparks from traveling
During the fire:
- Never leave a fire unattended; if you must step away, assign someone else to watch it
- Keep the fire at a manageable size; a larger fire is not a better fire
- Use a windbreak or your body to shield the flame and prevent spark spread in breezy conditions
- Add wood gradually and never use accelerants like gasoline or lighter fluid
Extinguishing completely:
Drown the fire with water, stir the ashes and embers thoroughly, then drown again. Feel the ashes with the back of your hand. A fire is not out until it is cold to the touch. Hot embers buried under ash can reignite hours later and start a wildfire. If water is scarce, use mineral soil or sand, stirring it into the coals until no heat remains.
Pro Tip: The "drown, stir, feel" sequence is the standard used by land management agencies across the United States. Run through it at least twice before you leave any fire site.
Why do most fire-starting attempts fail?
Most failed fire starts come down to the same handful of mistakes, and almost none of them involve the ignition tool.
The real culprits:
- Inadequate tinder preparation: Tinder failure is the most common cause of fire-start failure. A bundle that is too compressed, not fine enough at the center, or slightly damp will not sustain a spark long enough for kindling to catch.
- Skipping kindling entirely: Trying to light a large log from tinder is one of the most persistent beginner mistakes. Skipping kindling causes failure every time. Large wood cannot catch from a small flame; it needs heat built through progressively thicker stages.
- Kindling that is too thick: Early kindling should look almost too small. Matchstick-thin pieces come first, then pencil-thin, then finger-thick. If your first kindling is thumb-thick, the tinder will burn out before the wood catches.
- Adding fuel too early: Large wood placed on a young fire blocks airflow, crushes kindling, and absorbs heat before the fire is ready to sustain itself.
- Stopping too soon with friction methods: Thin smoke during a bow drill or hand drill is not a coal. Thick, sustained smoke that continues after you stop drilling is a coal. Beginners quit at the first wisp and miss the ignition entirely.
One practical habit ties all of these together: assemble the tinder bundle, stage kindling by size, and identify your fuel logs before you sit down to light. Doing this while calm removes the rushed-prep failure mode entirely. When conditions deteriorate, your only job is execution, not scrambling for materials.
A beginner-focused campfire guide can help you walk through each stage at your own pace before you head into the field.
What are the legal rules for outdoor fires in the United States?
Fire regulations in the United States vary by land type, season, and current fire danger conditions. Getting this wrong carries real consequences, including fines and liability for suppression costs if a fire escapes.
Key regulatory frameworks:
- National forests and BLM land: The U.S. Forest Service and Bureau of Land Management issue fire restrictions by district and season. Restrictions range from Stage 1 (no campfires outside designated rings) to Stage 2 (no open fires at all). Check the specific district's website or call the ranger station before your trip.
- State and county parks: Each state manages its own fire rules. Many California, Colorado, and Oregon parks issue seasonal fire bans during high-risk periods, sometimes with no exceptions even for gas stoves.
- Designated fire rings: Most developed campgrounds require fires to be built only in provided fire rings or fire pits. Building a fire on bare ground outside a ring is prohibited in most managed areas.
- Dispersed camping: On dispersed campsites, you are typically responsible for building a fire ring with mineral soil or rocks and restoring the site afterward. Some areas prohibit dispersed fires entirely during fire season.
- Burn bans: County-level burn bans apply even on private land in many states. These are issued by air quality management districts or county fire departments and are legally enforceable.
The simplest rule: check before you go. The BLM fire prevention guidelines and your state's forestry agency website are the authoritative sources. Assuming a fire is allowed because you have been to a site before is a common and costly mistake, especially during drought years. Checking a pre-trip adventure checklist that includes fire restriction verification is a practical way to build this habit.
Post-fire safety and environmental impact
Putting a fire out completely is as much a skill as lighting one. The environmental consequences of a poorly extinguished fire extend well beyond the campsite.
Immediate post-fire steps:
- Begin extinguishing at least 30 minutes before you plan to leave; rushing this step is where most accidents happen
- Drown all embers with water until the hissing stops, stir the ash bed thoroughly, then drown again
- Scatter any remaining ash and charcoal over a wide area once fully cold, or pack it out if the site requires leave-no-trace practices
- Restore the fire site by replacing any rocks or soil you moved, and scatter unused wood back into the surrounding area
Environmental considerations:
Campfire ash alters soil chemistry and can suppress plant regrowth in frequently used sites. In high-use areas, using a fire pan or fire blanket and packing out all ash is the most responsible approach. Burning only dead and downed wood (never cutting live branches) preserves the standing dead wood that cavity-nesting birds and insects depend on.
Smoke from campfires contributes to localized air quality issues, particularly in canyon campsites where smoke pools overnight. Keeping fires small reduces both smoke output and the risk of escape. A fire that fits inside a standard fire ring and burns down to coals within an hour is almost always sufficient for warmth or cooking.
The broader principle: wildfire prevention starts with how you treat the fire after the evening is over, not just how carefully you built it.
Key Takeaways
A reliable fire-starting process depends on preparation and sequence, not the quality of your ignition tool.
| Point | Details |
|---|---|
| Stage all fuel before igniting | Gather and sort tinder, kindling, and firewood before striking; rushing this step causes most failures. |
| Tinder prep determines success | Fluff the bundle to hold air; a compressed or damp tinder bundle will not sustain a spark. |
| Build the structure before lighting | Construct your tipi, log cabin, or platform lay around the tinder before you reach for a lighter or ferro rod. |
| Extinguish with drown, stir, feel | A fire is not out until it is cold to the touch; repeat the sequence at least twice before leaving. |
| Check fire regulations first | BLM, Forest Service, and county burn ban rules vary by season and location; verify before every trip. |
At Lifecampadventure, we build gear for people who take the outdoors seriously. Whether you are heading out for your first campfire or refining your survival fire techniques, having the right tools makes every step of the process more reliable. Browse our full range of camping and survival gear to find what belongs in your kit.