TL;DR:
- Mastering survival fire-starting requires layered, dry tinder, multiple ignition sources, and a prepared fire lay before striking the spark.
- Most failures stem from inadequate preparation, such as damp tinder, compressed bundles, or poor airflow, not the ignition tool itself.
- Consistent practice in challenging conditions builds essential skills and muscle memory, ensuring reliable fire-starting when it truly matters.
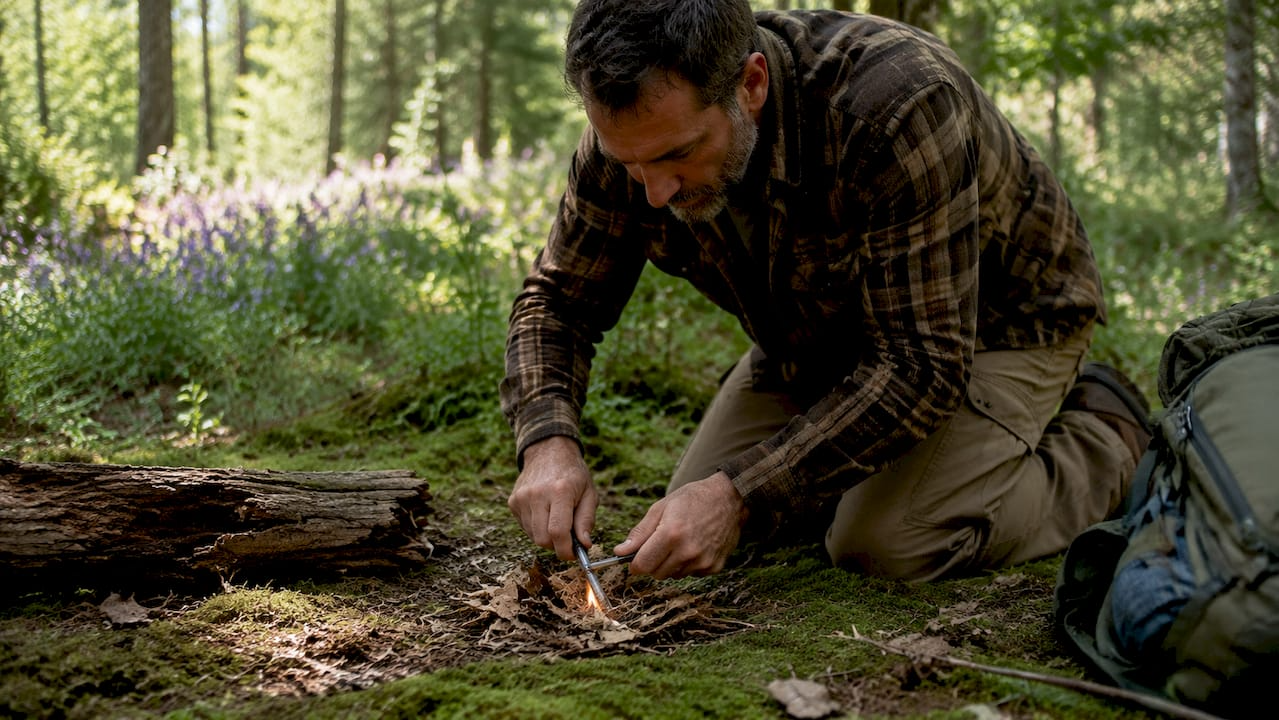
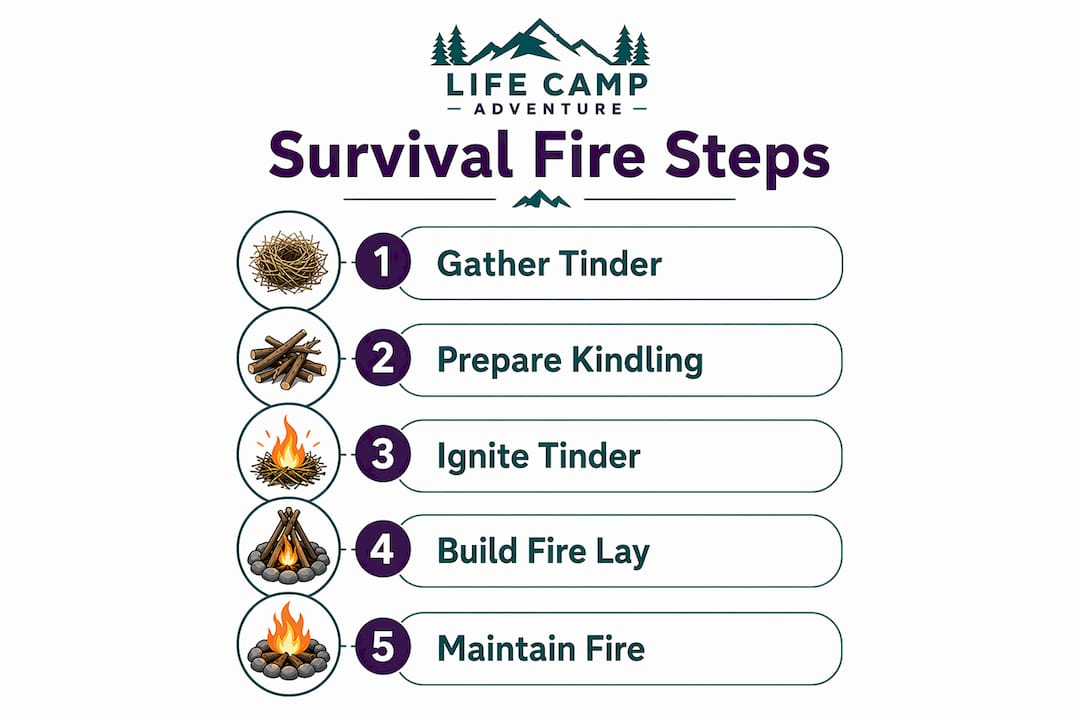
Starting a survival fire is the skill of creating and sustaining controlled flames in outdoor settings using tinder, kindling, fuel, and a reliable ignition source. Every camper, hiker, and emergency preparedness enthusiast needs this skill before they need it. Fire provides warmth, water purification, cooked food, and a visible signal for rescue. The core components never change: dry tinder to catch the spark, kindling to grow the flame, and fuel to sustain it. Modern tools like ferrocerium rods and waterproof matches make ignition faster, while primitive methods like the bow drill and hand drill give you a backup when gear fails.
What tools and materials do you need to start a survival fire?
The right materials are the difference between a fire in five minutes and no fire at all. Knowing what to carry and what to gather on the ground gives you options in any condition.
Ignition sources worth carrying
Every kit should include at least two ignition sources with different failure modes. A ferrocerium rod works when wet and produces sparks at around 5,400°F, making it one of the most reliable tools available. Waterproof matches from brands like UCO or Coghlan's serve as a fast backup. A standard Bic lighter is the fastest option in dry conditions but fails in cold and wind. A magnifying lens works in direct sunlight and requires zero consumables. True redundancy means each tool covers a different failure scenario, not just having three lighters.
Tinder, kindling, and fuel
Good tinder is dry, fine, and fluffy. Birch bark, dry grass, cattail fluff, cedar bark shavings, and commercial options like WetFire tinder cubes all work well. A three-layered tinder bundle gives you the best ignition structure: a fine inner core to catch the ember, a middle layer of shredded bark, and a loose outer wrap of dry leaves. Pack it loosely. Compression kills airflow, and airflow is what turns an ember into a flame.
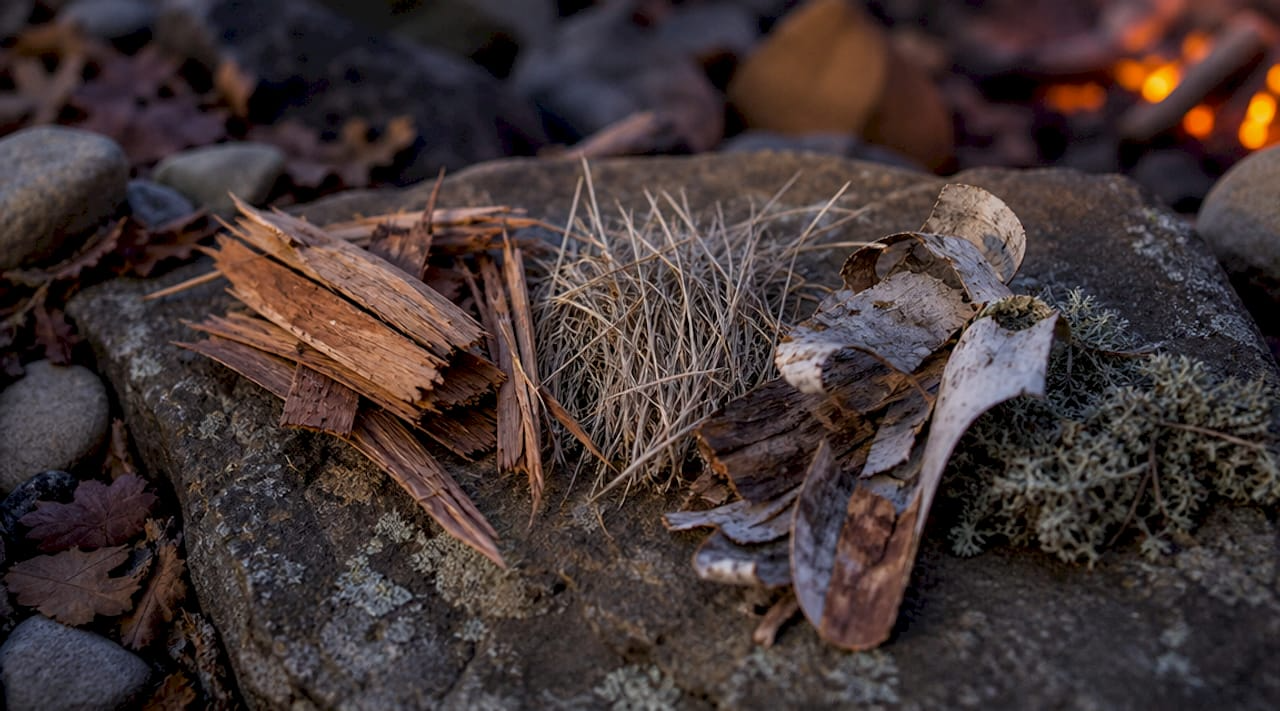
Kindling should be pencil-thin to finger-thick dry sticks. The snap test tells you everything: wood that snaps cleanly is dry enough to burn; wood that bends is too green. For fuel, standing dead wood is almost always drier than wood on the ground. Gather at least five times the amount you think you need before you light anything.
Pro Tip: Collect tinder and kindling before you need fire. Wet hands and fading daylight make material gathering much harder under pressure.
Here is a quick comparison of the most common ignition sources:
| Tool | Best condition | Weakness |
|---|---|---|
| Ferrocerium rod | Wet, cold, windy | Requires dry tinder |
| Waterproof matches | Calm, moderate cold | Limited quantity |
| Bic lighter | Dry, mild weather | Fails below freezing |
| Magnifying lens | Bright sunlight | Useless at night or in clouds |
| Bow drill | No gear available | High skill and effort required |
Site preparation
Clear a circle at least three feet wide of leaves, grass, and debris. Established fire rings contain embers and reflect heat back toward the fire, making them safer and more efficient than raw ground. Always have water and a small shovel within reach before you strike your first spark.
What are the most effective survival fire-starting techniques?
Fire works like a train building momentum through tinder, kindling, and fuel stages. Skipping any stage causes failure almost every time. Here are the primary methods in order of reliability.
Using a ferrocerium rod
- Place your tinder bundle on a flat, stable surface or hold it in your non-dominant hand.
- Position the ferro rod tip 1 to 2 inches above the tinder at a 45-degree angle.
- Hold the rod steady and draw the striker back with a firm, controlled stroke. Striking away from your body produces the best spark cluster without scattering the tinder.
- Once you see a glowing ember in the tinder, fold the bundle gently around it.
- Hold the bundle at face level and blow long, steady breaths directly at the ember. Short puffs scatter the bundle and kill the coal.
- When the bundle ignites, place it under your prepared fire lay and add kindling immediately.
Pro Tip: Scraping the ferro rod forward instead of pulling the striker back is the most common beginner mistake. It moves the rod away from the tinder and scatters your spark.
Modern alternatives
A Bic lighter is the fastest option in calm, mild conditions. Hold the flame under the tinder bundle for three to five seconds rather than touching it to a single piece. UCO Stormproof matches burn for 15 seconds in wind and rain, making them worth the extra cost for emergency kits. Fire paste and WetFire cubes extend burn time and give wet tinder a fighting chance.
Primitive friction methods
The bow drill, hand drill, and fire plough all work on the same principle: friction generates heat, heat generates a coal. Friction fire requires wood dust to reach at least 800°F (425°C) to form a viable coal. That takes consistent pressure and speed, not just effort. With a bow drill, maintain full-length strokes for 30 to 60 seconds. Early smoke is often just steam from moisture in the wood, not a coal forming. Keep going until the smoke thickens and continues after you stop bowing.
These methods are harder and slower than modern tools, but they work with zero gear. Practice them at home before you ever need them in the field.
Building the fire lay
Once you have a flame in your tinder bundle, place it inside your prepared fire structure. A teepee lay works best for getting a fire established quickly: lean kindling sticks over the burning tinder bundle in a cone shape, leaving a gap on the windward side for airflow. Add progressively larger sticks as the fire grows. Never add large fuel until you have a solid bed of small kindling burning steadily.
How do you troubleshoot and avoid common survival fire failures?
Most fire failures happen before the spark is ever struck. Fixing the preparation fixes the problem.
The most common failure points:
- Damp tinder. Ignition rarely fails; damp or compressed tinder does. If your tinder feels cool to the touch, it holds moisture. Dry it against your body or in the sun before use.
- Compressed tinder bundle. Packing the bundle too tight blocks airflow. The ember needs oxygen to grow. Loose structure is not optional.
- Wet kindling. Wood that bends instead of snapping will not catch. Swap it out before you waste your tinder bundle.
- Stopping too early on friction methods. Smoke does not mean coal. Keep pressure and speed consistent until the smoke continues after you stop.
- Poor airflow in the fire lay. Gaps in the structure are not mistakes. They are the fire's air supply. Maintain them.
"A fire that goes out is almost always a preparation failure, not an ignition failure. The spark is the easy part."
Pro Tip: Charred material stored in a small tin reduces ignition effort significantly. Charred natural material catches a spark far more easily than raw tinder. Replenish your supply by charring material in the coals before your fire dies.
Redundancy is not paranoia. Carrying a ferro rod, a lighter, and waterproof matches adds almost no weight and covers every realistic failure scenario. Store each in a separate location so a lost pack does not take all three.
How to build and maintain your survival fire safely
Building a fire correctly from the start saves fuel, reduces risk, and keeps the fire manageable when conditions change.
Choosing your fire structure
- Teepee: Best for quick ignition and cooking. Kindling leans over the tinder in a cone. Burns hot and fast.
- Lean-to: Best in wind. A large log on the windward side shields the fire while kindling leans against it.
- Log cabin: Best for a sustained, long-burning fire. Stack fuel in alternating square layers around the tinder. Burns slower and produces good coals.
- Top-down light: Stack large logs first, then medium, then kindling, then tinder on top. Light from the top. This method burns cleanly and requires less tending.
Maintaining and extinguishing your fire
Add fuel gradually. Dumping large logs on a young fire smothers it. Feed the fire in proportion to its current heat output, starting with finger-thick sticks and working up to wrist-thick fuel once a solid coal bed forms.
Safe extinguishing steps:
- Stop adding fuel at least 20 minutes before you plan to leave.
- Pour water over the fire slowly, stirring the ash and coals with a stick.
- Continue until the hissing stops completely.
- Press the back of your hand near the ash. If you feel heat, add more water.
- The standard is cold to the touch before you walk away.
Never use accelerants like gasoline or lighter fluid. They produce unpredictable flare-ups and are a leading cause of preventable wildfires. Gather all your fuel before lighting the fire. Running out mid-build and leaving to collect more is how fires escape.
Key takeaways
Mastering how to start a survival fire requires dry, layered tinder, at least two ignition sources, and a structured fire lay built before the spark is ever struck.
| Point | Details |
|---|---|
| Tinder preparation is critical | Dry, loosely packed, three-layered tinder bundles are the most common failure point to get right. |
| Carry multiple ignition sources | A ferro rod, lighter, and waterproof matches cover different failure conditions with minimal added weight. |
| Use the snap test for fuel | Wood that snaps cleanly is dry enough to burn; wood that bends will not catch reliably. |
| Build before you light | Prepare your full fire lay, tinder bundle, and kindling supply before striking your first spark. |
| Cold to the touch before leaving | Stir water into ash and coals until no heat remains. This is the only safe standard for extinguishing. |
Why I think most people practice fire starting backwards
I have watched experienced hikers struggle with a ferro rod in light rain while carrying a perfectly dry tinder bundle. The problem was not the tool or the tinder. It was that they had only ever practiced in their backyard on a calm afternoon. Practice in easy conditions builds the muscle memory that works when your hands are cold and the wind is picking up, but only if you deliberately add difficulty over time.
My honest observation after years of outdoor travel: most people treat fire starting as a gear problem. They buy a better ferro rod or a fancier tinder kit and never actually practice the technique. The ferro rod is not the skill. Striking it correctly, reading the ember, and blowing the tinder bundle into flame without scattering it — that is the skill. You build it through repetition, not through gear upgrades.
The psychological side matters too. Friction fire methods like the bow drill require patience that feels unnatural when you are cold and tired. Early smoke looks like progress but is often just steam. Stopping too soon is the most common failure in primitive fire starting. Knowing this in advance changes how you respond to it in the field.
My recommendation: use your ferro rod every single time you start a campfire, even when you have a lighter in your pocket. Save the lighter for genuine emergencies. That routine practice is what builds the redundancy that actually matters when conditions turn against you. Respect fire regulations, carry water, and leave every site cleaner than you found it.
— Billy
Gear that makes survival fire starting more reliable
The right gear does not replace skill, but it removes unnecessary variables when conditions are against you. At Lifecampadventure, we carry ferrocerium rods, WetFire tinder cubes, UCO Stormproof matches, and complete fire-starting kits built for real outdoor conditions. Every item in our survival gear guide is selected for durability and field reliability, not just shelf appeal. If you want a full picture of what to carry before your next trip, our outdoor survival checklist covers fire tools alongside every other category of emergency preparedness gear. Build your kit around redundancy, and you will never be caught without fire.
FAQ
What is the easiest way to start a survival fire?
A ferrocerium rod paired with a dry, three-layered tinder bundle is the most reliable method for most conditions. It works when wet, requires no fuel, and produces consistent sparks with proper technique.
How do I start a fire without matches or a lighter?
Friction-based methods like the bow drill or hand drill generate a coal through sustained pressure and speed. Wood dust must reach at least 800°F to form a coal, so consistent technique for 30 to 60 seconds is required before stopping.
Why does my tinder bundle keep going out?
Damp or compressed tinder is the primary cause. Pack the bundle loosely to allow airflow, and blow long steady breaths rather than short puffs to feed the ember without scattering it.
How much firewood should I gather before lighting?
Gather at least five times your expected amount before lighting. Running out of fuel mid-build is one of the most common reasons fires fail to establish.
How do I safely put out a campfire?
Pour water over the fire slowly, stir the ash and coals thoroughly, and continue until all hissing stops. Press the back of your hand near the ash. If you feel any heat, add more water. The fire is only safe when it is cold to the touch.
