TL;DR:
- Proper site selection and preparation are essential for safe and effective campfire building.
- Gathering sufficient dry tinder, kindling, and fuel wood is critical for successful ignition.
- Using correct fire structures and thorough extinguishing techniques ensures safety and environmental protection.
That first night in the woods, staring at a pile of sticks and wondering what to do next, is a feeling almost every new camper knows. Starting a campfire sounds like it should be instinctive, but without a clear process, it can feel overwhelming and even a little risky. The good news? With the right steps and a bit of preparation, anyone can build a safe, reliable campfire. This guide walks you through everything: choosing a safe site, gathering materials, picking a fire structure, lighting it correctly, and putting it out completely when you're done.
Key Takeaways
| Point | Details |
|---|---|
| Check fire regulations | Always confirm local fire rules and choose a safe, cleared site before building your campfire. |
| Prepare three fuel types | Collect enough tinder, kindling, and dry fuel wood for easy ignition and a sustainable fire. |
| Pick the right fire lay | Teepee, log cabin, or lean-to—each fire structure suits different weather and cooking needs. |
| Never use accelerants | Light your fire with matches or a lighter; avoid gasoline or liquid fuels for safety. |
| Fully extinguish before leaving | Extinguish, stir, and check for coolness by hand to prevent wildfires and camp damage. |
Choose and prepare your campfire site safely
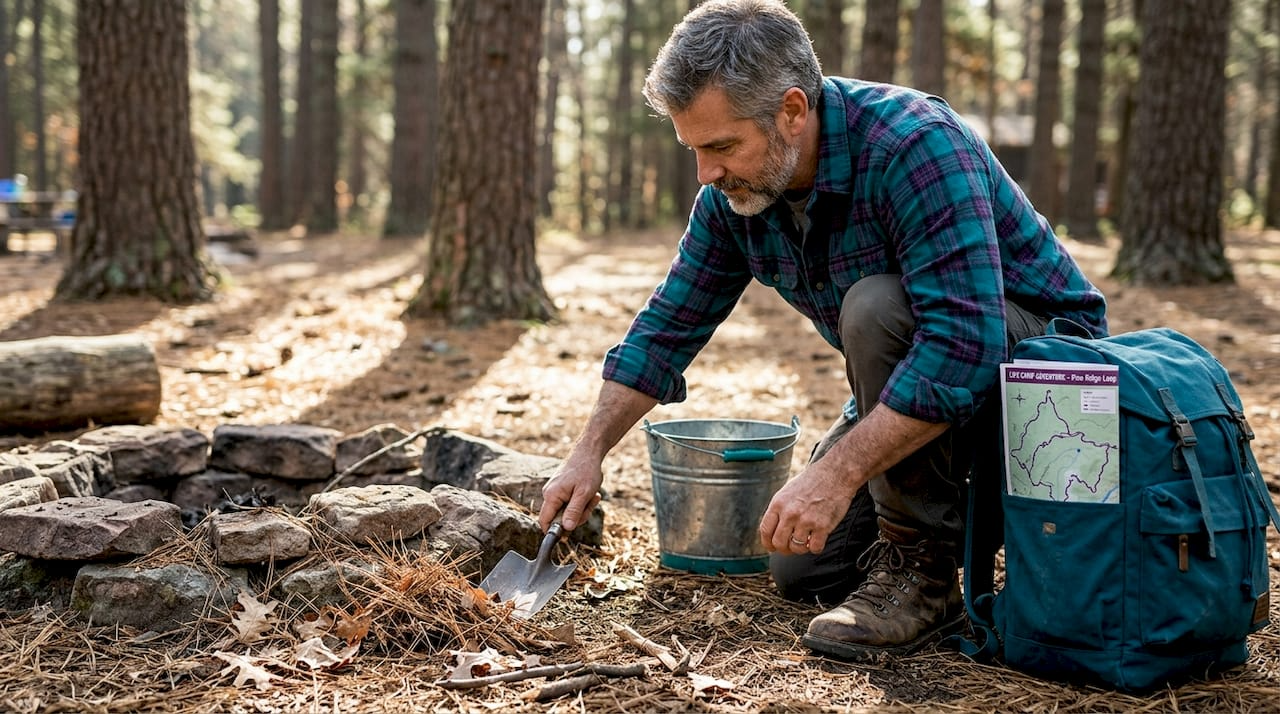
With your confidence boosted, let's focus on picking and preparing the perfect spot for your campfire. This step matters more than most beginners realize. Where you build your fire directly affects how safe the experience will be for you, your group, and the surrounding environment.
Before you collect a single stick, check current fire restrictions for your area. Many parks, forests, and campgrounds enforce seasonal fire bans, especially during dry summer months. Violating a fire ban can result in hefty fines and, more seriously, can contribute to wildfires that damage thousands of acres. A quick search online or a call to the park ranger station takes less than five minutes and could save you major trouble.
Once you know fires are allowed, safe outdoor campfires start with the right location. Always look for a designated fire ring first. Most established campgrounds provide them, and they're designed specifically to contain flames and protect the surrounding area. If no fire ring is available, you'll need to clear a 10-foot diameter area down to bare dirt.
According to campfire safety best practices, clear your site at least 15 feet from tents, sleeping areas, overhanging branches, dry grass, and any flammable items. This buffer zone gives you room to react if a spark jumps unexpectedly.
Here's a quick site checklist before you strike a single match:
- Check local fire bans or permit requirements
- Find a designated fire ring or clear a 10-foot bare dirt circle
- Remove all dry leaves, pine needles, and debris from the area
- Confirm at least 15 feet of clearance from tents and overhanging trees
- Have a bucket of water or a water source nearby
- Keep a shovel within arm's reach at all times
Safety rule: Never build a campfire on grass, even if it looks green. Grass dries out quickly with heat, and a small spark can spread faster than you'd expect.
Here's a simple reference to help you assess your site before you build:
| Site condition | Safe to build? | What to do |
|---|---|---|
| Designated fire ring | Yes | Use as-is |
| Bare dirt, 10-foot clear area | Yes | Remove any debris first |
| Grass or organic ground | No | Find another location |
| Near dry brush or trees | No | Clear or relocate |
| Active fire ban in effect | No | Use camp stove instead |
Gather the right materials: tinder, kindling, and fuel wood
With a safe site ready, your next step is gathering the right materials so your fire lights on the first try. Many first-time campers underestimate how much material they need, and how important it is to have the right type at each stage. A fire that fails to catch usually comes down to one simple problem: not enough of the right stuff.
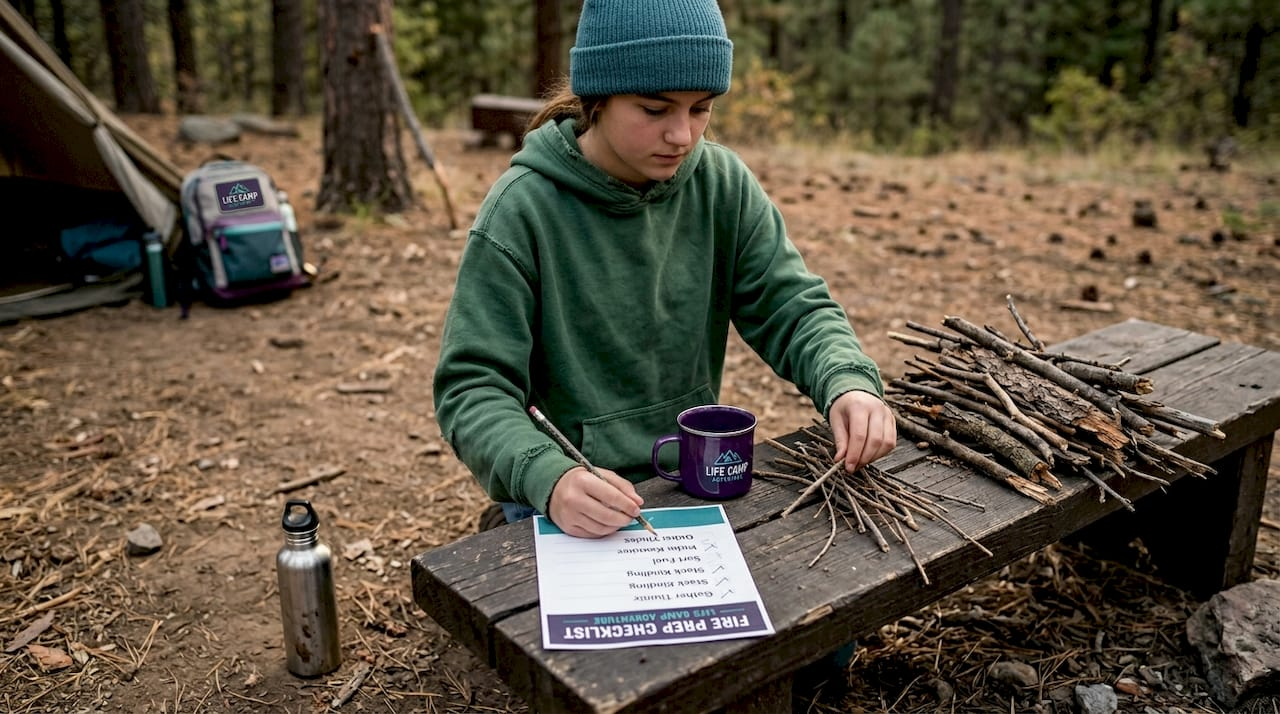
Fire-building relies on three distinct layers of material. Think of it like a pyramid. You need the smallest, most flammable items at the base, progressively adding larger pieces as the fire grows. Getting this sequence right is the key to a fire that lights fast and burns consistently.
According to RJourney's campfire guide, you should gather three material types: tinder, kindling, and fuel wood, in sufficient quantities before you attempt to light anything. Here's how each one works:
- Tinder: The smallest, driest, most flammable material you can find. Dry leaves, dead grass, bark shavings, birch bark, or even dryer lint from home all work well. You need a bundle about the size of your fist, and it must be completely dry. Even slight dampness will kill your fire before it starts.
- Kindling: Dry sticks ranging from pencil-thick to thumb-thick. Gather at least an armful, far more than you think you'll need. Kindling is the bridge between your tiny spark and your larger fuel logs.
- Fuel wood: Dry, dead branches or split logs about wrist-thick or larger. Look for wood that snaps cleanly when you break it. Wood that bends or feels spongy is too wet. Never cut branches from living trees.
| Material type | Size | Key characteristics | Examples |
|---|---|---|---|
| Tinder | Finger-thin or smaller | Bone dry, catches spark easily | Dry leaves, lint, bark shavings |
| Kindling | Pencil to thumb-thick | Dry, snaps cleanly | Small twigs, dry sticks |
| Fuel wood | Wrist-thick or larger | Dry, dead, snaps without bending | Logs, thick branches |
Pro Tip: Gather twice the kindling you think you'll need. Seriously, double it. Running out of kindling before your fuel catches is the number one reason beginner fires fail. It takes more material than you expect to bridge that gap.
Build your campfire: Teepee, log cabin, or lean-to?
With plenty of supplies, it's time to build your fire structure. How you arrange your materials before you even light a match determines how easily your fire catches, how hot it burns, and how long it lasts. Three layouts work particularly well for beginners.
Teepee fire lay: This is the most popular starting point for new campers. Place your tinder bundle in the center of the fire ring. Lean kindling sticks around it in a cone shape, like the poles of a teepee. Add slightly larger sticks over the kindling, keeping the teepee shape. This structure allows maximum airflow and lights fast. It's excellent for getting a fire going quickly, though it burns down faster than other methods.
Log cabin fire lay: Stack two pieces of fuel wood parallel to each other on either side of your tinder bundle. Lay two more pieces perpendicular on top, like a square log cabin. Continue stacking, alternating direction, and gradually narrowing toward the top. Build a small teepee of kindling inside the structure. This method creates deep, even coals that are perfect for campfire cooking because the heat is steady and long-lasting.
Lean-to fire lay: Designed for windy conditions. Push a long kindling stick into the ground at an angle, pointing into the wind. Lean shorter sticks against it, creating a roof over your tinder bundle. The structure blocks wind from directly hitting the tinder while still allowing enough airflow for combustion.
According to Smokey Bear's campfire safety guide, matching your fire lay to conditions is a key step beginners often skip, which leads to frustration and wasted materials.
Here's a quick comparison to help you choose:
| Fire lay | Best for | Burn time | Difficulty |
|---|---|---|---|
| Teepee | Quick warmth, fast lighting | Short | Easy |
| Log cabin | Cooking, long burns | Long | Moderate |
| Lean-to | Windy weather | Medium | Easy |
How to build step by step:
- Place your tinder bundle in the center of the cleared area or fire ring.
- Build your chosen structure around and above the tinder with kindling.
- Add a layer of fuel wood around the outside, leaving gaps for airflow.
- Double-check that your kindling is dry and your structure is stable before lighting.
Ignite and manage your campfire—safely and reliably
After building your fire lay, here's exactly how to safely spark it to life and keep it under control. Lighting a fire is where many beginners get impatient, and impatience leads to mistakes.
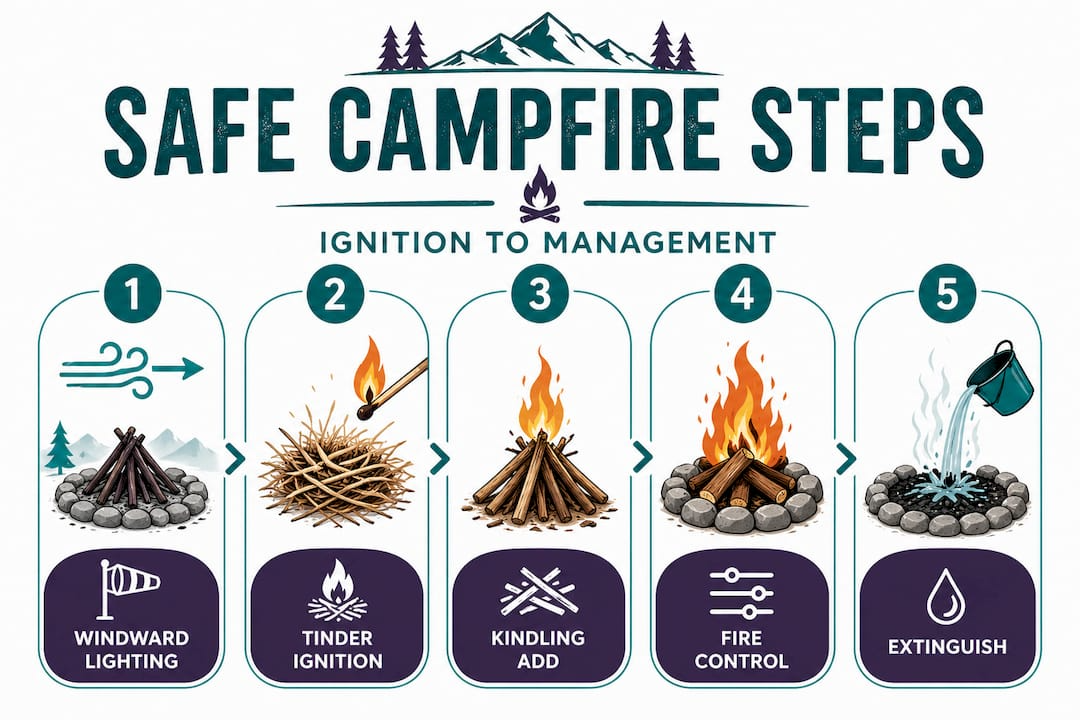
Always light from the windward side, meaning the side the wind is blowing from. This pushes the flame into the tinder rather than away from it. Use a match or lighter held close to the base of the tinder bundle. The USFS campfire safety guide is very clear: never use liquid fuels like gasoline or lighter fluid to start or revive a campfire. These substances can cause sudden, uncontrollable flare-ups that seriously injure people.
Once the tinder catches, blow gently and steadily at the base of the flame. This adds the oxygen that a young fire needs to grow. Think of it like fanning a tiny ember to life. Add kindling one piece at a time as the flame grows, laying pieces loosely so air can still move between them.
Steps for lighting your campfire safely:
- Check wind direction and position yourself on the windward side.
- Light the tinder at its base using a match or lighter.
- Blow gently at the base if the flame is struggling.
- Add kindling gradually, one piece at a time.
- Once kindling is burning steadily, add fuel wood in small stages.
- Keep the fire small enough that you can control it at all times.
Important: Never leave a burning campfire unattended, even for a short time. Fires can spread in seconds, especially in dry or windy conditions. Always assign someone to watch the fire if others need to step away.
Pro Tip: If conditions are very windy or dry, skip the campfire entirely and use a camp stove. It's not giving up. It's smart camping. Following campfire safety procedures includes knowing when not to build a fire.
How to extinguish your campfire and leave zero trace
Now that you're finished, here's how to extinguish your fire so you and everyone else stay safe. Putting out a campfire correctly is just as important as building one, and it takes longer than most people expect.
The process has a name among experienced campers: drown, stir, drown, feel. It's simple but must be done thoroughly.
Steps to fully extinguish your campfire:
- Start pouring water slowly over the entire fire, not just the center flames.
- Listen for hissing sounds. Keep adding water until all hissing stops.
- Stir the ashes and embers with a shovel, mixing them with the wet soil underneath.
- Pour more water over the stirred ashes.
- Test the temperature by holding the back of your hand a few inches above the ash. If it feels warm at all, repeat the process.
- Only leave when the fire area is completely cool to the touch.
According to the National Park Service campfire guidelines, never bury coals to extinguish them. Buried embers can smolder underground for hours and reignite hours after you've left the area, a common cause of wildfires.
Leave no trace rule: Pack out all ash and charred material if you created your own fire pit. If using a designated ring, leave it clean of trash and excess debris.
Pro Tip: Always bring more water to the fire site than you think you'll need for extinguishing. A single water bottle is not enough. A gallon-sized jug or a dedicated water bucket gives you what you need to drown your fire properly. This is also connected to preventing wildfires before they start.
What most campfire guides leave out: failure points and smarter shortcuts
Now that you understand the main process, here's what you'll rarely hear elsewhere and why it matters for your first real experience in the field.
Most campfire guides give you the correct steps, but they skip the failure points. The truth is, the majority of first-time campfire attempts fail at the same two spots: not enough kindling, and wood that's wetter than it looks. Ground-level wood absorbs moisture from soil, dew, and rain, even when the weather seems dry. Standing dead wood (dead branches still attached to a tree) is nearly always drier than wood you find on the ground, and it splits and snaps the way good fuel wood should.
Here's another thing guides rarely tell you: practice at home first. Seriously. Set up your fire lay in a backyard fire pit or even on a driveway before your first camping trip. Going through the motions when there's no pressure to succeed teaches you how materials behave, how the structure feels when it's right, and what kindling thickness works best. When you get to your campsite, your hands already know what to do.
The habit of doubling your kindling is backed by experience, not just theory. Many beginners stop gathering once they think they have enough, then run short right before the fuel catches. That moment when your kindling burns out before the larger logs ignite is the most frustrating part of campfire failure. Gather more than feels necessary, and you'll rarely have a problem.
One more shortcut worth mentioning: bring fire starters from home. Wax-coated fire starters, compressed wood wool sticks, or even petroleum jelly-coated cotton balls are all excellent backup tinder options. They light in wet or cold conditions far more reliably than natural materials, and they take up almost no space in your pack. Think of them as insurance. Once you get better at reading natural materials and building solid structures, you may not need them. But on your first few trips, they can be the difference between a warm evening and a frustrating failure. Beginner campfire cooking also gets a lot easier once you have reliable ignition as a foundation.
Find your next campfire adventure with reliable gear
Ready to put your campfire skills to the test? Make sure you have the right gear for a safe and memorable experience. Knowing the steps is half the battle. Having gear you can actually trust in the field is the other half.
At Life Camp Adventure, we've built our product line around exactly what beginners need: tools that work reliably when conditions get tough, materials that pack light, and gear that supports safe, responsible outdoor experiences from day one.
Whether you're looking for a top camping gear comparison to find the right fire-starting kit, or you want to browse our full range of essential camping gear, we've made it easy to find what you need before your next trip. From shovels and water containers to fire-starting tools and camp stoves, every item we carry is selected with real-world camping in mind. Head to the site, explore our recommendations, and build a kit you can rely on.
Frequently asked questions
What is the safest way to start a campfire?
The safest way is to use a designated fire ring with at least 15 feet of clearance from tents and flammable objects, always keeping water and a shovel within reach before you light anything.
What materials do I need for a beginner campfire?
You need tinder like dry leaves or bark, pencil-to-thumb-thick kindling, and dry fuel wood; gather twice as much kindling as you think you'll need, since running short is the most common reason beginner fires fail.
Which campfire structure should I use for cooking?
A log cabin fire lay is the best choice for cooking because it burns longer and produces steady, even coals that give consistent heat under a pot or grill grate.
How do I fully extinguish a campfire before leaving?
Pour water until hissing stops, stir the ashes with a shovel, pour again, and test with the back of your hand; only leave when everything is completely cold to the touch.
What should I do if I can't start a fire due to wet wood or bad weather?
Look for dry standing dead wood still attached to trees since it holds less moisture than ground-level wood, or switch to a camp stove in windy, extremely dry, or fire-restricted conditions.
