TL;DR:
- Knowing how to build an emergency shelter can save your life in unpredictable situations and is a practical skill anyone can learn.
- Proper site selection, insulation, ventilation, and environment-specific adaptations are essential for effective shelter construction.
You could be two miles from the trailhead when a storm rolls in fast. Or a disaster could force you out of your home with nothing but the clothes on your back. Knowing how to build an emergency shelter step by step is not a skill reserved for survival experts. It is a practical, learnable set of actions that can keep you alive when conditions turn serious. This guide covers everything from site selection and materials to building emergency shelter in multiple environments, so you walk away with a clear, repeatable plan.
Key takeaways
| Point | Details |
|---|---|
| Site selection comes first | Choosing the right location protects you from wind, water, and terrain hazards before you build anything. |
| Insulation beats size | A smaller, well-insulated shelter retains body heat far better than a large, drafty one in cold conditions. |
| Ventilation is non-negotiable | Even sealed or snow-covered shelters need 4-5 inch openings to prevent dangerous carbon monoxide buildup. |
| Adapt to your environment | Warm climates need shade and airflow; cold climates need low ceilings and insulated walls to trap heat. |
| Practice changes everything | Running quarterly drills builds the muscle memory and confidence that matter most when real emergencies hit. |
Emergency shelter step by step: what you need before you build
Before you place a single branch or unroll a tarp, two decisions will determine whether your shelter works: what you bring and where you build.
Tools and materials
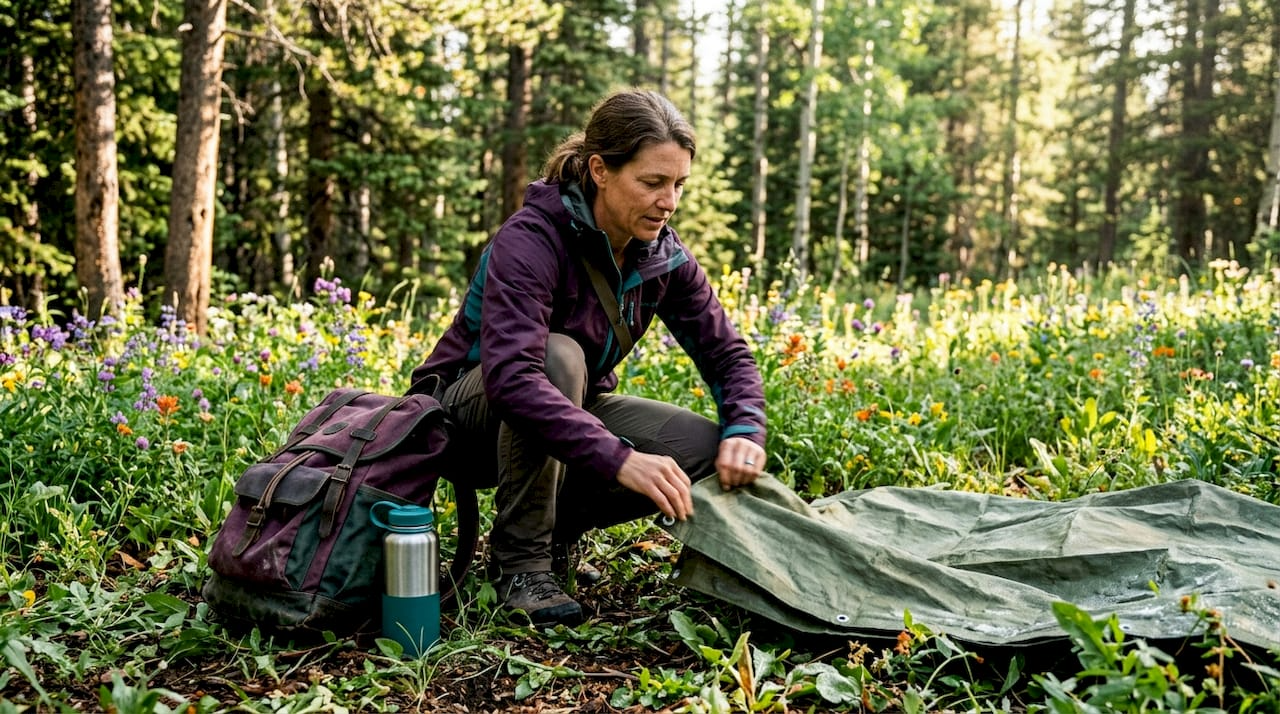
You do not need a fully loaded pack to build a functional shelter. You need the right basics. Here is what covers most scenarios:
- Tarp or emergency blanket (at least 8x10 feet)
- 550 paracord or cordage (50 feet minimum)
- Fixed-blade knife or multitool
- Duct tape
- Plastic sheeting (for urban sheltering in place)
- Work gloves (dry hands stay functional longer in cold)
- Tent stakes or rock anchors
Natural materials like dry leaves, pine branches, and bark can substitute for modern gear in a wilderness setting. The key is knowing which materials insulate and which trap moisture against your body.
| Material | Best use | Notes |
|---|---|---|
| Dry leaves | Ground insulation, roof layering | Must be dry. Six or more inches thick for debris huts. |
| Pine boughs | Framing, wind blocking | Dense and widely available in most forests |
| Tarp or poncho | Waterproof roof layer | Fastest to deploy with cordage |
| Plastic sheeting | Urban seal-in situations | Pre-cut and labeled sheets cut deployment time by over 50% |
| Paracord | Ridgepole lashing, guy lines | Tested to 550 lbs; versatile in all conditions |
Choosing your shelter site
This is where most people rush and pay for it later. Spend three to five minutes scanning before you commit to a spot. Look for natural wind protection like rock formations or dense tree lines on your windward side. Avoid low ground where cold air settles and water pools. Stay away from dead trees that could fall and from dry riverbeds that flood without warning.
Pro Tip: Face your shelter entrance away from the prevailing wind direction. In most of North America, that means opening to the east or southeast, where cold northwest winds lose most of their force.
Check for outdoor shelter types that work best with the natural features around you. A hillside with an exposed rock face, for example, is a natural back wall for a lean-to.
How to build an emergency shelter: step-by-step construction
This section covers the three most practical shelter types you can build with minimal gear: the lean-to, the debris hut, and the tarp shelter. Start with the one that matches your available materials.
Building a lean-to
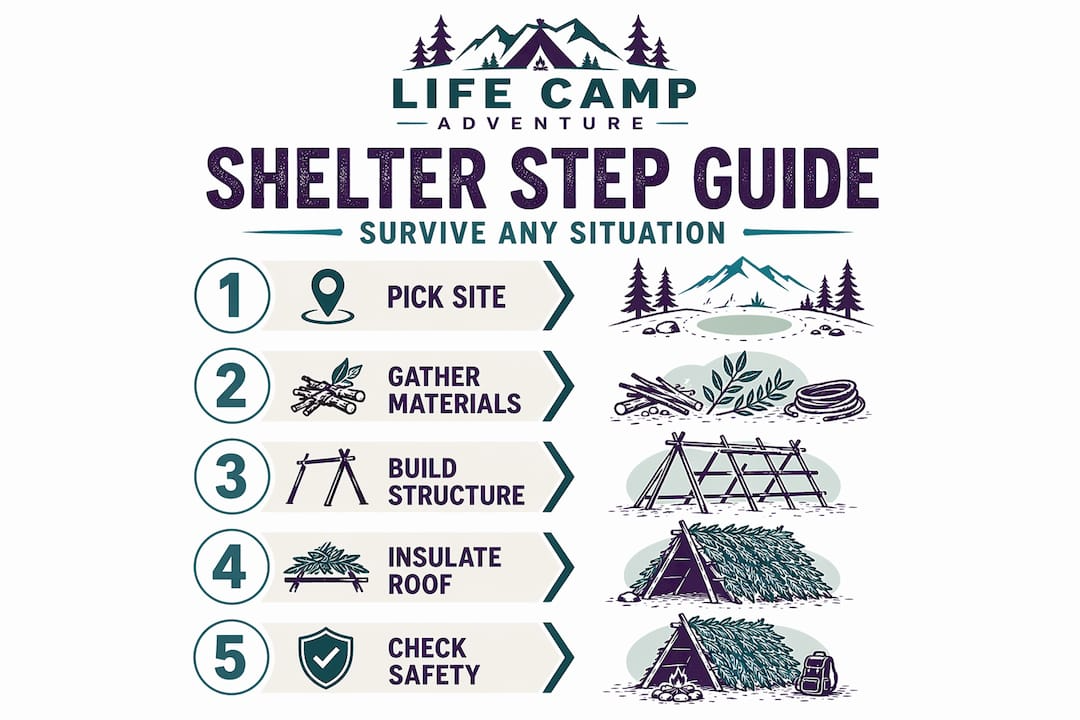
- Find or create a ridgepole. Locate a sturdy branch or fallen log roughly 8 to 10 feet long. Lash it horizontally between two trees at shoulder height using paracord.
- Lean branches against the ridgepole. Place branches at a 45-degree angle from the ridgepole to the ground on the windward side. Space them about 6 inches apart.
- Layer crosshatching material. Weave smaller branches horizontally across your angled supports. This creates a lattice that holds insulating material in place.
- Add your insulation layer. Pile leaves, pine needles, or bark over the lattice from bottom to top, like roof shingles, so water runs off rather than soaking through.
- Build your ground insulation. Place at least 6 inches of dry leaves or pine boughs on the floor beneath your sleeping area. Heat loss through the ground is as critical as heat loss through the roof.
- Close the sides. Fill the open side edges with packed leaves or leaned branches to block wind from sweeping through.
Building a tarp shelter
If you have a tarp and paracord, you can have overhead cover in under 10 minutes.
- Run a length of paracord between two trees at about chest height and tie it off tightly.
- Drape the tarp over the line so it hangs equally on both sides.
- Pull one edge down to the ground at a low angle (about 30 degrees) on the windward side, and stake it or weight it with rocks.
- Pull the opposite edge out wider to create interior headroom and stake it down.
- Close the ends by folding and securing excess tarp material or blocking with branches.
Pro Tip: Angle the low side directly into the wind. This creates a wedge shape that deflects wind over the shelter rather than pushing it inside.
Building a debris hut
The debris hut is the best option for cold nights with no gear. It works like a sleeping bag made of natural materials.
- Start with a ridgepole roughly 9 feet long, propped up by a forked branch or rock at one end and touching the ground at the other.
- Lean branches along both sides of the ridgepole to create a ribbed frame.
- Pile debris (leaves, pine needles, bark) over the frame until the layer is at least 2 to 3 feet thick on all sides.
- Stuff the interior with dry leaves. Crawl in and the leaf mass traps your body heat almost immediately.
Common beginner mistakes: building too large (you lose body heat fast in extra space), using wet leaves (they compress and conduct cold), and forgetting to block the entrance once inside.
Adapting your shelter to the environment
The same shelter that saves your life in a pine forest could fail completely in a desert or during a chemical hazard event. Experts emphasize tailoring shelter design to the actual threat you face.
Cold climate adjustments
Emergency shelter standards call for 4.5 to 5.5 square meters per person in cold environments, with insulated walls, roofs, and interior heating to maintain 15 to 19 degrees Celsius inside. For DIY builds, the most important cold-weather rule is ceiling height. Keeping the ceiling at or under 2 meters concentrates warmth and dramatically reduces the heating load on your body.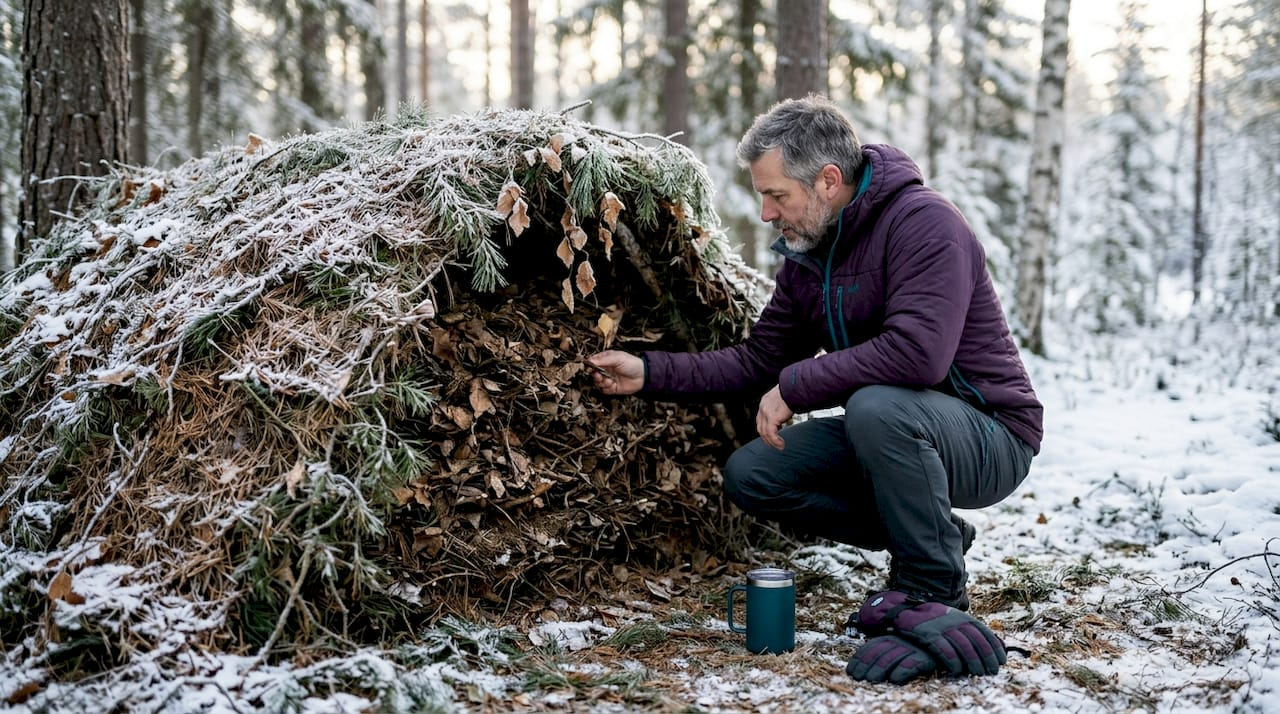
Hot and desert environments
Flip your priorities completely. Shade is your shelter. Build or position your overhead cover to block direct sun from above, and elevate the structure to allow air to flow underneath. Avoid enclosed spaces that trap heat. A tarp strung high between trees at a flat angle works better in the desert than any enclosed debris hut.
Sheltering in place during hazardous events
Urban emergencies require a different approach entirely. When chemical or biological hazards are present, you seal a room rather than build from scratch.
- Choose an interior room with minimal windows and doors.
- Pre-cut plastic sheeting to fit each opening before any emergency occurs. Labeling each sheet by location cuts your deployment time by more than half.
- Use duct tape to seal all edges completely, including electrical outlets and vents.
- Monitor local emergency broadcasts and unseal only when authorities confirm it is safe.
| Environment | Primary threat | Key shelter adjustment |
|---|---|---|
| Cold forest | Hypothermia | Low ceiling, thick debris layer, blocked entrance |
| Hot desert | Heat stroke | High overhead shade, open sides, airflow priority |
| Heavy rain | Hypothermia and flooding | Elevated sleeping surface, steep roof pitch, drainage trench |
| Urban hazard | Chemical or biological exposure | Sealed room, pre-cut sheeting, interior air management |
Verifying your shelter: safety, comfort, and durability
Building the shelter is only half the job. You need to check it before you rely on it.
The shelter verification checklist
Run through these before you settle in for the night:
- Stability test. Push against the ridgepole and main supports. If the structure shifts significantly, reinforce contact points before adding weight.
- Ventilation check. Even a fully sealed or snow-buried shelter needs open airflow. Maintain 4 to 5 inch openings to prevent carbon monoxide buildup from any heat source inside.
- Waterproofing check. Sprinkle water on the roof layer and watch where it goes. Fix gaps now, not at 2 AM.
- Ground insulation depth. Press your hand flat against the floor covering. If you feel cold within 30 seconds, add more material.
- Entrance seal. A backpack, large debris pile, or extra tarp section should block the entrance without cutting off all airflow.
"The shelter that looks finished rarely is. Walk around it once before you crawl in." This single habit catches most problems before they become dangerous ones.
Pro Tip: If you used any kind of fire or candle inside your shelter, let the space air out for five minutes before sleeping. Residual carbon monoxide lingers even after a flame is extinguished.
Signs your shelter needs immediate repair: pooling water inside, structural creaking under wind load, frost forming on interior walls in cold conditions, or difficulty maintaining body temperature after 30 minutes inside.
Staying ready: practice and gear maintenance
The survival techniques that save lives are the ones you have done before. Reading this guide once helps. Running a timed drill helps ten times more.
Here is a practical readiness schedule to build real confidence:
- Monthly. Check your emergency kit. Replace expired supplies, repack your tarp and cordage, and verify your knife edge.
- Quarterly. Run a full shelter build drill. Time yourself from gear access to a completed overhead structure. Experts recommend practicing gear location in darkness and timing complete assembly.
- Seasonally. Build a shelter suited to the current season. A summer tarp setup and a cold-weather debris hut require different muscle memory.
- After any outdoor trip. Note what worked, what slowed you down, and what gear you wish you had. Update your kit accordingly.
Store your shelter materials together in one designated bag or section of your pack. Searching through disorganized gear in the rain costs you the time and body heat you need most.
Pro Tip: Teach your shelter-building process to someone else. Explaining each step out loud forces you to identify gaps in your own understanding. It also means two people in your group can build faster than one.
My honest take on emergency shelter preparedness
I have spent time in situations where a shelter was not a project. It was the only option. And the single clearest thing I have learned is this: the people who struggle are not the ones who lack information. They are the ones who have only ever read about it.
What most beginners overlook is the mental friction of building under stress. Your hands are cold, your visibility is low, and the steps that seemed obvious on paper feel scrambled. That is not a knowledge failure. It is a practice failure. The first time you build a debris hut in your backyard with good weather and no pressure, you will make three mistakes you never expected. That is exactly the point.
I also think the gear conversation gets overcomplicated. You do not need a specialty emergency bivy to survive. A tarp, 50 feet of cordage, and 20 minutes of practice will outperform expensive gear you have never handled. Gear matters. Familiarity with that gear matters more.
The other thing worth saying directly: do not build your confidence around one shelter type. A lean-to in a forest is useless when you are caught in an open field. An urban seal-in approach means nothing if you are three miles from the nearest building. Versatility comes from doing, not from knowing.
Start simple. Build something this weekend. Time yourself. Then build it again faster.
— Billy
Gear up with Lifecampadventure

At Lifecampadventure, we built our gear line specifically for the moments when conditions stop being comfortable and start being serious. Whether you are looking to compare shelter options before your next trip or need a complete survival gear guide to round out your kit, we have done the research so you do not have to guess under pressure. Our tent comparison guide walks you through every major shelter category side by side, from ultralight tarps to four-season structures, so you can match your gear to your actual environment. If you are serious about being prepared, start with the right equipment. Browse the full Lifecampadventure collection at lifecampadventure.com and gear up before you need it.
FAQ
What is the fastest emergency shelter to build?
A tarp lean-to using paracord and two anchor points can be completed in under 10 minutes with practice. It provides immediate overhead protection and adapts well to most environments.
How much ventilation does an emergency shelter need?
Even fully enclosed or snow-covered shelters need 4 to 5 inch openings to prevent carbon monoxide buildup. Never seal a shelter completely, especially if any heat source is in use.
What is the best insulation for a debris hut floor?
Dry leaves or pine needles packed to at least 6 inches deep provide the best readily available ground insulation. Heat loss through the ground is a leading cause of hypothermia in improvised shelters.
How do I shelter in place during a chemical emergency?
Select an interior room, seal all windows, doors, and vents with plastic sheeting and duct tape, and monitor official broadcasts. Pre-cutting and labeling plastic sheets for each opening before any emergency reduces your setup time by more than 50%.
How often should I practice building an emergency shelter?
Quarterly drills are the standard recommendation from preparedness experts. Focus each session on locating your gear quickly and completing a full shelter build from start to finish, ideally under realistic conditions like low light or cold temperatures.
