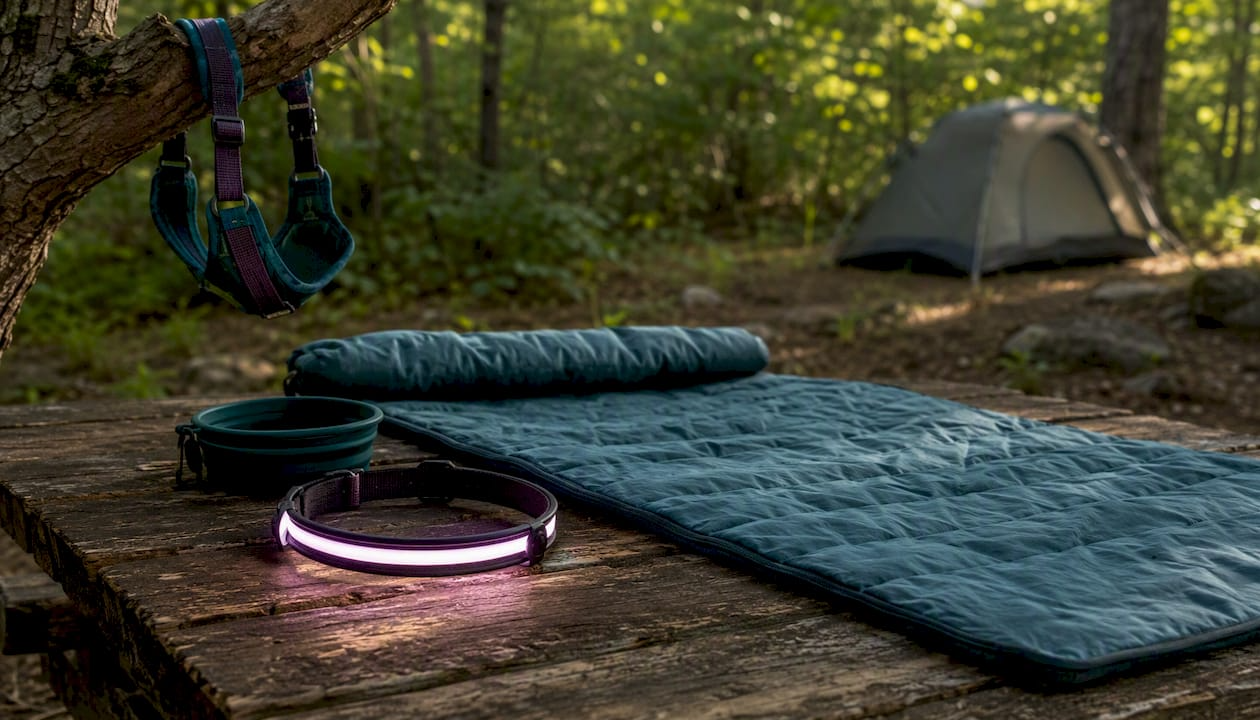
For safe, comfortable dog camping, pack a vet-approved first-aid kit, a high-visibility collar or light, a collapsible water system, a durable sleeping pad, and a secure containment option. Those five items cover the most common ways a camping trip goes sideways for a dog. Lifecampadventure carries a curated, tested selection of all of them, so you can build the full kit from one source instead of hunting across a dozen product pages.
Here is what every dog needs before you leave the trailhead:
- First-aid kit: covers cuts, tick removal, heat emergencies, and paw injuries — the most frequent campsite incidents
- High-visibility light or collar: keeps your dog locatable after dark and during early-morning fog
- Collapsible water system: prevents dehydration, which sets in faster on the trail than at home
- Insulated sleeping pad or dog bed: keeps dogs off cold, damp ground and supports joints overnight
- Containment option (harness, leash, or crate): satisfies campground leash rules and prevents wildlife encounters
Lifecampadventure's outdoor gear collection covers each of these categories with gear built for actual camping conditions, not casual backyard use.
Key Takeaways
The safest, most practical approach to camping with dogs gear is to buy safety items first, test everything at home for two weeks, and pack by trip length rather than trying to bring everything at once.
| Point | Details |
|---|---|
| Safety gear comes first | Buy a first-aid kit, harness, and LED collar before any comfort items. |
| Test at home, not at camp | Run harnesses, booties, and sleeping pads at home for 2–4 weeks to catch fit issues early. |
| Water and food storage matter | Use a 2–3L carrier for hydration and sealed roll-top bags to prevent wildlife encounters. |
| Visibility saves dogs after dark | Choose a rechargeable LED collar with at least a 6–8 hour runtime as your primary night-safety tool. |
| Lifecampadventure for the full kit | Lifecampadventure carries camping-specific dog gear tested for durability, packability, and real outdoor conditions. |
What should you pack as camping with dogs gear?
This checklist is organized by priority. Buy and test the safety items first, then work down to comfort and convenience.
Dog-specific first-aid kit — the single most important item. At minimum it should contain a tick remover, pet-sized gauze rolls, vet tape, antiseptic wipes or spray, a pet thermal blanket, and paw balm. BuzzFeed's gear roundup highlights these exact contents as the items most reviewers trust for camping.
Collapsible silicone water bowl — packs flat, weighs almost nothing, and works for both water and food. Buy one rated for boiling water so you can sanitize it.
Large-capacity water carrier — a water carrier sized to handle multiple dogs or hot-weather outings without constant refills.
Dog sleeping pad or bed — closed-cell foam for budget trips, self-inflating for comfort. Test it at home before the trip.
Harness with a top handle — gives you control on rocky terrain and doubles as a lift point if your dog needs help over an obstacle.
Fixed-length leash (6 ft) — required at most U.S. campgrounds. Pack a spare.
LED collar or clip-on safety light — rechargeable, water-resistant, with several hours runtime.
Sealed food storage — a roll-top dry bag or a hard-sided container keeps kibble fresh and deters wildlife.
Poop bags and odor-proof carrier — never leave camp without at least double what you think you need.
Plant-based wipes and high-absorbency towel — for muddy paws, wet coats, and post-swim cleanup.
When to buy premium vs. budget: Spend more on the harness, first-aid kit, and water carrier. These items take the most stress and directly affect safety. The sleeping pad and towel are fine at a mid-range price point.
Pro Tip: Pack at least one spare leash and a duplicate set of any daily medications. Testing gear at home — especially booties, a new harness, and the sleeping pad — eliminates fit surprises at camp.
How do you choose sleeping gear and shelter for your dog?
A sleeping pad, a sleeping bag-style dog bed, and a standard dog bed are not interchangeable. Each fits a different scenario.
A closed-cell foam pad is the lightest and most durable option for backpacking. It does not compress under weight, so it maintains its insulation value even after a heavy dog lies on it all night. The trade-off is bulk. A self-inflating pad packs smaller and offers more cushion, which matters for senior dogs or large breeds with joint issues. According to TreelineReview's camping checklist, durable and washable sleeping pads are a priority for multi-day trips because they need to survive repeated packing and unpacking without losing loft.
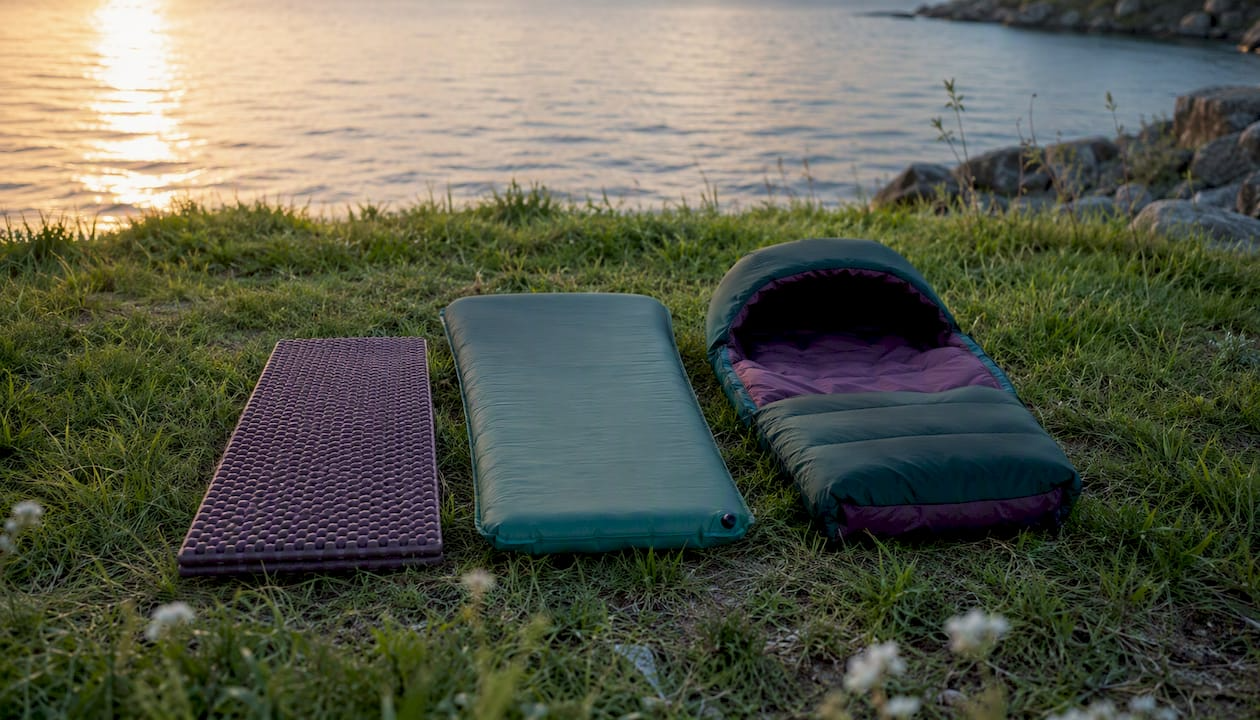
A sleeping bag-style dog bed adds a hood or wrap that traps body heat. These work well for short-coated breeds in temperatures below 45°F. For double-coated breeds like Huskies or Malamutes, a simple pad is usually enough. Check the sleeping bag insulation guide for a breakdown of fill types that applies equally to dog and human sleeping gear.
Tent and ground insulation considerations
Size up your tent by one category when bringing a large dog. A two-person tent becomes genuinely cramped with a 70-pound Labrador. The vestibule is useful for storing muddy gear, but most dogs sleep better inside the main tent body where it is warmer.
Ground insulation matters more than most owners expect. Cold ground pulls heat away from a dog faster than cold air does. Place the sleeping pad directly on the tent floor, not on top of a sleeping bag, so the insulation sits between the dog and the ground.
- Small dogs (under 25 lbs): a standard dog bed or a compact self-inflating pad works well
- Medium dogs (25–60 lbs): a self-inflating pad or a sleeping bag-style bed rated to the expected low temperature
- Large dogs (60+ lbs): a closed-cell foam pad or a thick self-inflating pad; prioritize joint support over packability
Pro Tip: Sharing your sleeping bag with your dog feels cozy but creates hygiene issues and reduces your own insulation. A dedicated dog pad keeps both of you warmer and cleaner.
How do you keep your dog hydrated and fed off the grid?
Dehydration is the most underestimated risk in dog camping. Dogs lose water faster during exercise, and many owners do not notice the signs until the dog is already sluggish or panting heavily at rest.
Water systems by trip type:
For car camping, a 2–3L collapsible water carrier stored in the cooler is the simplest setup. Collapsible silicone bowls weigh under two ounces and fold to the size of a hockey puck. For backpacking, a bottle-integrated dispenser lets you offer water directly from your pack without stopping to pour. A 77-ounce dispenser handles two medium dogs through a full day of hiking without a refill.
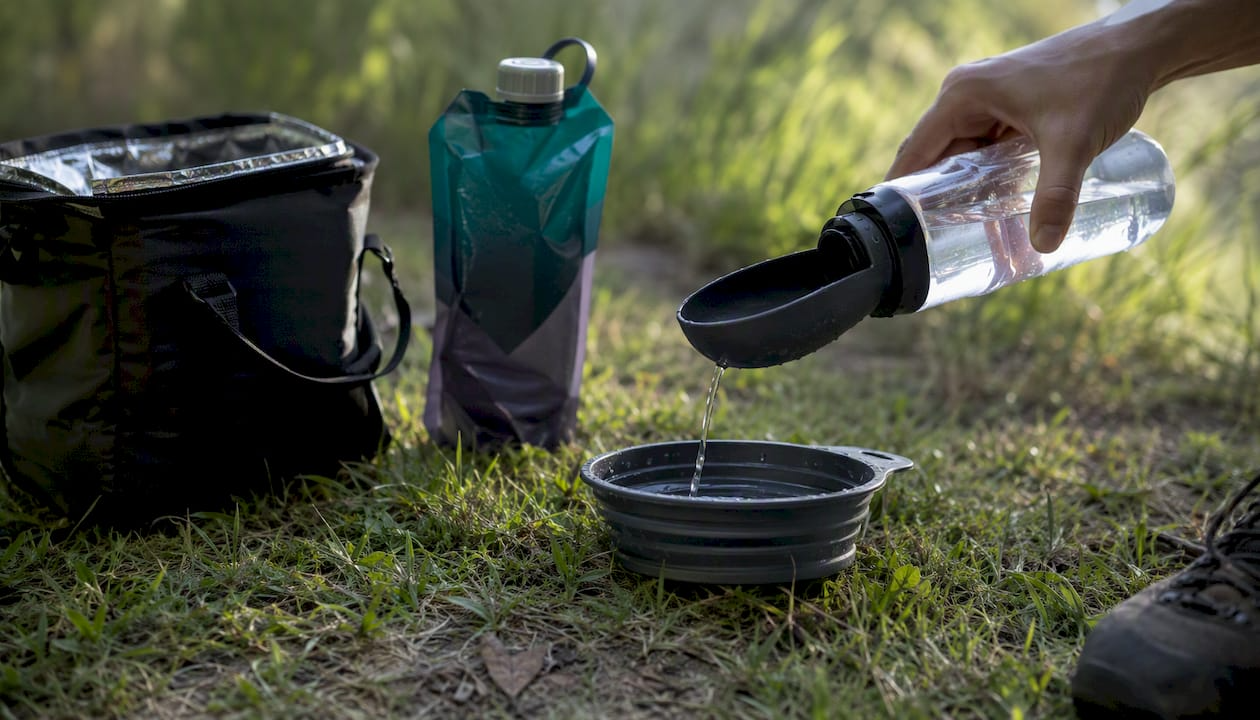
On-trail water safety matters. Natural water sources can carry Giardia and Leptospira, both of which affect dogs. Filter or treat any water your dog drinks from streams or lakes the same way you would treat your own.
Food storage and rationing:
TreelineReview notes that sealed food storage prevents both wildlife encounters and kibble spoilage on multi-day trips. Roll-top dry bags work well inside a car trunk or bear box.
Fresh food is fine for one-night trips stored in a cooler. For multi-day outings, stick to dry kibble or freeze-dried options that do not require refrigeration. Introduce any new food at home first — a sudden diet change in the field causes GI upset faster than almost anything else.
What goes in a dog first-aid kit for camping?
A dog-specific first-aid kit is the one item where cutting corners creates real risk. A human first-aid kit does not cover the scenarios dogs face on the trail.
| Item | Purpose |
|---|---|
| Tick remover tool | Safe tick extraction without squeezing the body |
| Pet-sized gauze rolls | Wound packing and bandaging |
| Vet tape (self-adhesive) | Holds bandages without sticking to fur |
| Antiseptic wipes or spray | Cleans cuts and abrasions |
| Pet thermal blanket | Stabilizes body temperature in shock or hypothermia |
| Paw balm | Treats cracked or abraded pads |
| Tweezers | Splinter and debris removal |
| Blunt-tip scissors | Cutting tape and trimming fur around wounds |
| Saline solution | Eye and wound flushing |
| Diphenhydramine (Benadryl) | Allergic reaction management (confirm dose with your vet) |
Common campsite emergencies and immediate steps:
- Cuts and lacerations: rinse with saline, apply antiseptic, wrap with gauze and vet tape. If bleeding does not slow within five minutes, apply firm pressure and head to the nearest emergency vet.
- Heat stroke signs: excessive panting, drooling, bright red gums, disorientation. Move the dog to shade immediately, apply cool (not cold) water to the paw pads and groin, and offer small amounts of water. Get to a vet as fast as possible.
- Tick removal: use the tick remover tool to grasp the tick as close to the skin as possible and pull straight out with steady pressure. Never twist. Clean the site with antiseptic and monitor for swelling over the next 48 hours.
- Water-related emergencies: if your dog swallows significant water and shows bloating, weakness, or vomiting, treat it as an emergency. Secondary drowning symptoms can appear hours after the incident.
Pro Tip: Before any camping trip, update your dog's ID tags and microchip information, bring current vaccination records, and confirm flea, tick, and heartworm prevention is current. Note the address of the nearest 24-hour emergency vet before you leave home.
How do you contain and control your dog safely at a campsite?
Containment is where most dog-camping problems start. A dog that slips a collar, bolts after wildlife, or tangles a tie-out around a tent stake creates a dangerous situation fast.
Harness vs. collar:
A harness distributes pressure across the chest and shoulders instead of the throat, which matters on steep terrain where a dog might lunge or slip. For camping, choose a harness with a top handle (useful for lifting over obstacles), reinforced stitching at the attachment points, and a reflective strip. A collar is fine for holding ID tags but should not be your primary control point on the trail.
Leash types:
- Fixed-length (6 ft): the standard for campgrounds; most sites require it by rule. SaratogaDogLovers' checklist confirms that many campgrounds mandate on-leash policies, so a fixed-length leash is non-negotiable.
- Long lead (15–30 ft): useful at dispersed campsites where you want to give a dog more range without losing control. Anchor it to a ground stake, not a tent pole.
- Hands-free leash: clips to a hip belt and frees your hands for trekking poles. Good for trail hiking, less practical at a busy campsite.
- Retractable leashes: avoid them on trails and campgrounds. They offer no quick-stop control, tangle easily around legs and trees, and the cord can cause rope burns.
Crates and car restraints:
A travel crate gives a dog a secure, familiar space in the car and at camp. Size it so the dog can stand, turn around, and lie flat. For car travel, a crash-tested harness or a secured crate is safer than a loose dog in the back seat. Test the crate at home for at least a week before the trip so the dog sees it as a comfortable space, not a punishment.
Tie-outs: check campground rules before using one. Many sites prohibit them, and an unsupervised dog on a tie-out can wrap the line around obstacles or injure itself trying to reach wildlife.
When do dogs need booties, jackets, and paw protection?
Paw protection is not just for winter. Hot pavement, sharp granite, and wet pine needles all damage pads faster than most owners expect.
When to pack booties: rocky or technical terrain, snow and ice, hot sand or asphalt above 90°F, and any trail where you have seen glass or debris. Booties with a rubber sole and a snug Velcro closure work for most conditions. For cold and wet terrain, look for a neoprene or fleece lining.
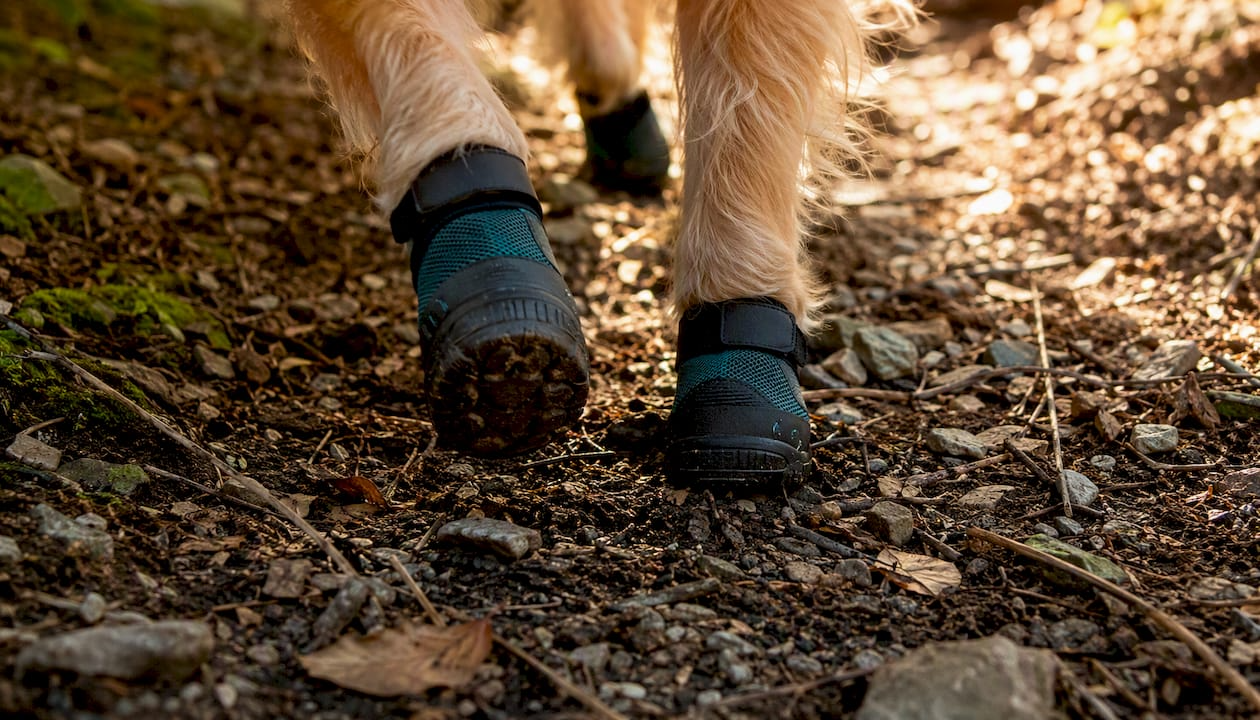
When paw balm is enough: smooth dirt trails, light grass, and moderate temperatures. Apply balm before and after the hike to keep pads supple and prevent cracking. It also soothes minor abrasions at the end of the day.
Sizing and acclimation:
Measure each paw by pressing it flat on paper and tracing the outline. Width is the critical measurement, not length. Most dogs need a week of short indoor sessions to accept booties without shaking them off. Start with two minutes, reward heavily, and build up to a full walk before the trip.
Pro Tip: For cold nights below 40°F, a dog jacket adds meaningful warmth for short-coated breeds, small dogs, and seniors. Check the cold-weather camping guide for layering principles that apply directly to dog gear selection.
Jackets for dogs follow the same layering logic as human outdoor apparel: a base layer for warmth, a water-resistant shell for wet conditions. Most dogs only need the shell layer unless temperatures drop below freezing.
How do you keep your dog visible and safe after dark?
Visibility gear is one of the most skipped items in a dog-camping kit and one of the most consequential. A dark-coated dog in a campground at night is nearly invisible to other campers, cyclists, and vehicles.
LED collar vs. clip-on light vs. reflective vest:
An LED collar provides 360-degree visibility and stays in place during movement. Look for a rechargeable model with multiple modes (steady, flash, pulse) and a runtime of at least 6–8 hours. A clip-on light is a cheaper backup option but can snag on brush and fall off. A reflective vest adds passive visibility during the day and in headlights at night, but it provides no active light source.
For longer nights or multi-day trips, BuzzFeed's roundup recommends rechargeable LED collars with multi-mode settings as the most reliable choice. Bring a spare clip-on light as a backup in case the collar runs out of charge mid-night.
The safety lighting principles that apply to cyclists at night translate directly to dogs: runtime, water resistance, and rechargeability matter more than brightness alone.
Routine night checks: do a quick visual sweep of your campsite before turning in. Confirm the dog's light is on, the leash is secure, and there are no gaps in the tent or pen that a curious dog could push through.
A bell or sound device can help during daylight hours in dense brush where you cannot see your dog clearly. At night, LED is the better tool.
How do you keep your dog and campsite clean?
Hygiene at camp is partly about your dog's comfort and partly about not attracting wildlife or violating Leave No Trace principles.
Pack list for cleanup:
- Poop bags (at least double your expected count) and an odor-proof carrier or zip-lock bag for used bags
- Plant-based, unscented wipes for paw and coat cleanup between full baths
- A high-absorbency microfiber towel (one dedicated to the dog, separate from yours)
- A portable rinse bottle or a small solar shower bag for post-swim or muddy-trail cleanup
Waste disposal by campsite type:
At developed campgrounds, use designated waste stations when available. At walk-in or backcountry sites, pack out all waste in a sealed bag. Never bury dog waste near water sources or on heavily trafficked trails. At dispersed campsites, follow the same cat-hole rules that apply to human waste: at least 200 feet from water, trails, and camp.
Leave No Trace rules for dogs:
Store dog food in a sealed container or car trunk at night, the same as human food. Rinse any soapy water used for cleaning at least 200 feet from natural water sources. Keep your dog out of streams and lakes near other campers' water sources when possible.
What should you buy first, and what does it cost?
Timeline:
- 2–4 weeks before the trip: buy and test the harness, booties, sleeping pad, and crate. Run the harness on daily walks. Put the booties on for short indoor sessions. Let the dog sleep on the pad at home.
- 3–7 days before: assemble the first-aid kit, confirm medications are stocked, update ID tags, and pack the food storage system. Do a full dry run of the packing list.
- Day of: fill the water carrier, charge the LED collar, and do a final leash and harness fit check.
Typical cost ranges:
| Item | Entry-level | Mid-range | Premium |
|---|---|---|---|
| Dog first-aid kit | $15–$25 | $30 | $60+ |
| Harness with handle | $20 | $40–$70 | $80 |
| Sleeping pad or bed | $15–$30 | $35 | $70 |
| Water system (bowl + carrier) | $10–$20 | $25–$45 | $50 |
| LED collar or safety light | $10–$20 | $25–$45 | $50 |
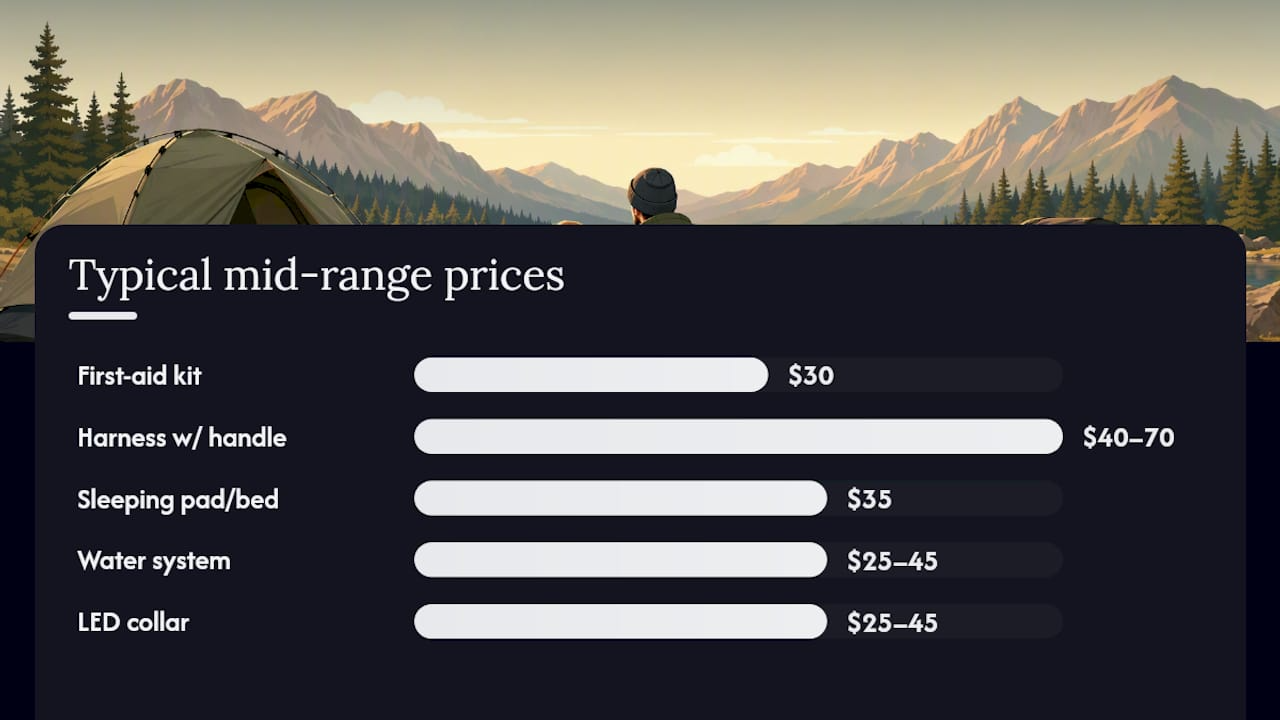
Buying order rule of thumb: safety first (first-aid kit, harness, leash), then sleep and hydration, then visibility and hygiene. Booties and jackets are situational and can wait until you know the terrain.
For a complete human packing list that pairs with this dog kit, the car camping packing guide covers the rest of your gear in the same priority order.
How do you measure your dog for harnesses, life jackets, and booties?
Getting the size wrong on a harness or life jacket is not just uncomfortable — it is a safety issue. A harness that slips off on a steep descent or a life jacket that rides up in water can put your dog in real danger.
What to measure:
- Neck circumference: measure at the base of the neck where a collar sits. Add one inch for comfort.
- Girth (chest circumference): measure the widest point of the chest, directly behind the front legs. This is the most important measurement for harnesses and life jackets.
- Back length: measure from the base of the neck to the base of the tail for jacket sizing.
- Paw width: press the paw flat on paper, trace the outline, and measure the widest point. Do all four paws — they are often slightly different sizes.
Three-point fit check:
- Range of motion: with the harness on, watch your dog walk. The front legs should swing freely with no rubbing at the armpit.
- Two-finger rule: you should be able to slide two fingers under any strap. If you cannot, loosen it. If you can fit a whole hand, tighten it.
- Handle access: for harnesses with a top handle, grab it and lift slightly. The harness should not shift forward or backward on the dog's body.
Breed-specific notes: deep-chested breeds like Greyhounds and Dobermans often need a size up from what their girth measurement suggests. Short-legged breeds like Dachshunds and Corgis need a harness with a short back panel. Broad-necked breeds like Bulldogs often need a custom or adjustable fit.
Why Lifecampadventure's dog camping kit stands out
Lifecampadventure builds its dog-camping selection around gear that performs in actual camping conditions, not just casual park walks. The difference shows in the details: harnesses with reinforced stitching at the D-ring, sleeping pads with washable outer covers, and LED safety lights with water-resistant ratings suitable for rain and stream crossings.
Each item in the kit has been selected for packability alongside human gear. A sleeping pad that rolls to the size of a water bottle, a collapsible bowl that clips to a pack strap, a first-aid kit that fits in a hip-belt pocket — these are not accidental features. They reflect the reality that dog gear competes for space with your own tent, sleeping bag, and food.
Testing notes by category:
- Harness: test on a full-length hike before the trip. Check for hot spots behind the front legs after 30 minutes of movement.
- Sleeping pad: leave it inflated overnight at home. If it deflates, find the leak before you are at camp.
- LED collar: run it through a full charge cycle and test all light modes. Confirm the clasp holds under pressure.
Pro Tip: Hipcamp's camping checklist recommends confirming flea and tick prevention before every trip. Add that check to your two-week-out timeline alongside gear testing.
Lifecampadventure's outdoor safety checklist pairs well with the dog kit for a full-camp safety review before departure.
Portable dog waste disposal and environmental responsibility
Waste management is the part of dog camping that most guides underplay. Dog waste left on the ground near water sources introduces pathogens that affect both wildlife and other hikers. The Leave No Trace Center for Outdoor Ethics recommends packing out all dog waste in most backcountry settings, not burying it.
The practical setup: carry a dedicated odor-proof waste bag carrier clipped to your pack. Brands like Poop Bags and Earth Rated make compostable bags that reduce plastic waste without sacrificing seal integrity. For multi-day trips, a small hard-sided container with a screw-top lid contains odor better than a zip-lock bag alone.
At developed campgrounds with waste stations, use them. At sites without infrastructure, the pack-it-out rule applies. Never leave waste bags hanging on trail markers or tree branches — a common but damaging habit that leaves plastic in the environment indefinitely.
GPS collars and emergency communication for dogs
A GPS collar is the single upgrade that changes the outcome of a worst-case scenario. If your dog bolts after a deer or slips a leash in unfamiliar terrain, a GPS collar gives you a real-time location instead of a search grid.
Current GPS dog collar options fall into two categories: cellular-dependent trackers (require a cell signal, which is often absent in backcountry areas) and satellite-based trackers (work off-grid but carry a higher subscription cost). For car camping near developed areas, a cellular tracker like Tractive or Fi Series 3 covers most scenarios. For backcountry trips, a satellite-capable device is worth the added cost.
Battery life is the practical constraint. Most GPS collars run 24–72 hours on a single charge depending on tracking frequency. Bring a portable battery pack and charge the collar each night at camp. Pair the GPS collar with a physical ID tag that includes your cell number and a secondary contact — technology fails, but a tag does not.
How do you transport your dog to and from the campsite?
Travel gear is often the last thing owners think about and the first thing that causes problems. A dog that is anxious or unsecured in the car arrives at camp already stressed, which makes the first night harder.
Carriers: soft-sided carriers work for dogs under 20 pounds and fit in most back seats. For medium and large dogs, a hard-sided travel crate secured with a seatbelt or cargo strap is the safer option. The crate doubles as a sleeping space at camp, which reduces the total gear load.
Crash-tested harnesses: if you prefer a harness over a crate for car travel, choose one that has passed the Center for Pet Safety's crash-test protocol. Most standard harnesses have not been tested and offer minimal protection in a collision.
Reducing travel anxiety: cover the crate with a light blanket to reduce visual stimulation. Place a worn T-shirt inside for scent familiarity. Stop every two hours on long drives to let the dog stretch, drink water, and relieve itself. Arriving calm makes the first night at camp significantly easier.
What most dog-camping guides get wrong
The conventional wisdom says to buy the best gear you can afford and your dog will be fine. That framing misses the real variable: a dog that has never worn booties, slept on an inflatable pad, or spent a night in a crate will not suddenly accept those things at camp. The gear is only half the equation. The other half is the two to four weeks of at-home practice that makes the gear invisible to the dog by the time you arrive at the trailhead.
The second thing guides underplay is the gap between day-hike gear and overnight camping gear. A standard flat collar and a retractable leash work fine for a park walk. They are genuinely inadequate for a campsite where your dog might encounter wildlife at 2 AM, need to be lifted over a log crossing, or spend eight hours tethered while you sleep. The gear requirements are different because the conditions are different.
What actually works: buy the harness and sleeping pad first, test them at home for two weeks, then add the first-aid kit and visibility gear. That sequence means the items your dog needs most are also the ones they are most comfortable with by trip day.
Get the full kit from Lifecampadventure
Lifecampadventure gives you a single, tested source for every item on this list — no piecing together gear from five different brands or guessing whether a harness rated for casual walks will hold up on a rocky descent.
The selection covers the full range from a basic one-night kit to a multi-day adventure setup. Each item is chosen for camping-specific durability: washable materials, water-resistant ratings, and packability that works alongside your own gear. The car camping packing guide on the site helps you match the dog kit to your own gear list so nothing gets left behind.
For first-time dog campers, start with the safety tier: first-aid kit, harness, LED collar, and a sleeping pad. Add the water system and food storage next. Build up to the full kit as you add more nights to your trips.
Browse the full outdoor gear selection at Lifecampadventure and pick the tier that matches your next trip length.
Sources
The following sources were used for safety guidance, packing checklists, and product-feature context throughout this guide:
- Essentials for Camping with Your Dog: A Pet-Friendly Camping Checklist | Hipcamp Journal
- Dog Camping Essentials: What to Pack for a Safe Trip
- Essential Dog Camping Gear You Need
- Camping With Your Dog: A Complete Checklist
